Reports
This chapter contains:
- Definition of Print Options
- How to E-mail TBO Reports in .pdf Format
- Report Descriptions & Directions for Printing
Introduction
Trams Back Office reports are designed to be extremely flexible and complete. By understanding the report categories and specific selection criteria, much information can be accessed. In addition to industry specific reports, activity reports, and statements, sections of Trams Back Office reports also contain analysis capabilities. The Invoice, Client and Vendor Activity Report results are displayed graphically with color charts options.
Printing Trams Back Office Predesigned Reports
Each report has a selection criteria screen when the parameters of the report are requested. At the bottom of each select criteria screen, see the following options:

Print Options
|
Preview |
Use this option to view the report on the computer screen. Preview As PDF, As Excel, As Doc, As HTML, or As Text. On any report Preview screen, move from page to page using the icons at the top of the screen. To view the first page Click the first icon. To view the PreviousPage, Click the second icon. To view the next page Click the third icon.Click the fourth icon to go the last page of the report. |
|
Export |
Reports can be exported To File or To Email As PDF, As Excel, As Doc, As HTML, or AS Text. Note: When using Excel, data is only exported as text. There are no numeric values or calculations. |
|
|
Print the results of the report Using Default Printer and Setting or click on Printer Settings to pick a different printer. |
|
Printer Setup |
For multiple printers connected to the computer, use this button to select the correct printer for output. After selecting the printer, click the print button to send the report to the printer. Note: To change the default printer on-the-fly, go to File|Printer Setup. |
|
Reset |
Erase any changes made and bring the report back to default settings. |
|
Default |
After setting up the report, click Default. Settings are saved. To return the Selection criteria Screen back to original database defaults, click Default and select “Remove the Current Default Settings.” |
|
Close |
Close the screen to go back to the main menu. |
Special Note: Zoom in and out using the mouse wheel when over a previewed report. After running any report to the Preview Screen, move mouse over the previewed report, and while holding <Ctrl> down, scroll the mouse wheel up and down to zoom in or zoom out making the report view larger or smaller for easier viewing.
E-mail Reports in .pdf Format
E-mail any report in Trams Back Office in .pdf format. The advantage of formatting reports in this format is that the report data is always perfectly printed out by anyone who has the Adobe Acrobat Reader. This free reader is obtained by going to www.adobe.com.
E-mail Reports for MAPI Compatible Users
MAPI (Messaging Application Protocol Interface) requires use with compatible e-mail programs such as Microsoft Outlook.
Note: A direct Outlook integration by default is in place in TBO in addition to MAPI. If Outlook is not open e-mail will revert to MAPI. Export the report to email. The attachment will be To File or To Email As PDF, As Excel, As Doc, As HTML, or AS Text.
E-mail Reports for Non-MAPI Compatible Users
If the e-mail system is non-MAPI compatible (such as AOL), follow these steps to send reports. Export the report to email. The attachment will be To File or To Email As PDF, As Excel, As Doc, As HTML, or AS Text.
Core Reports
The Reports menu is organized by type of report. The following reports are listed under Core and are considered the foundation of Trams Back Office. Once these reports are up and running, the integrity of the information appearing on all other reports is verified. For more information on setting up these reports, please see the chapter entitled, Setting Up Trams Back Office.
Type of Reports
|
Client Balances |
A complete listing of any pending client balances (Accounts Receivables). |
|
Vendor Balances |
A complete listing of any pending vendor balances (Vendor Accounts Payable). |
|
ARC Balances |
List of unpaid ARC transactions. Must use ARC Settlement for accurate data. |
|
Check Register |
Automated bank account, including all bank activities and balances. |
|
Management Summary |
Captures the status of the business at a glance. All of the vital agency statistics are included in one report. |
Client Balances
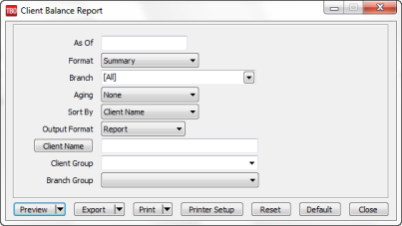
The Client Balance report is a complete listing of all pending client balances. This includes all unpaid invoices (Accounts Receivable) as well as unapplied payments and vouchers (Gift certificates, overpayments, etc.).
-
Click Reports|Core|Client Balances.
-
Select Settings.
As Of
When an As Of date is specified, the system provides client balances as of the specified date by backing out all entries before that date. (Double click on the field for a calendar menu.) If the As Of date is left blank, the system generates a current listing of client balances including all invoices and payments entered regardless of date.
Format
Summary lists Client Name, Invoices Total, Total Unapplied and Balance Due. Detail also lists each open invoice for each client including the Invoice #, Branch, Issue Date, Agent and Invoice Amount.
Branch
Allows the report to be processed by branch or branches.
Aging
Breaks down balances into these categories:30/60/90; 15/30/45; 7/14/21 days; and End-of-Month from the As Of date entered. In Summary, the aged Client Balance Report correctly highlights in red any clients that are over their credit limit. Note: Use of End of Month Aging field on Client Balance Report: If credit terms are given by the end of the month, there is flexible date system for aging the Client Balance Report when run in Summary.
LT 30 Days.............31-61 Days.............62-89 Days...........Over 89 Days TO
Current Month. .....Current Month -1.....Current Month -2.......Current Month - 3 Plus
APR........................MAR......................FEB.....................JAN & OLDER
Sort By
Determines the way the report is sorted when displayed or printed. The default is Client Name. To track its clients by Client (or Interface/DK Number) ID, use the drop-down menu to select Client ID. There is also an Agent sort by, and a Credit Limit Proximity which lists first clients who are closest to, or over their credit limit.
Output Format
From the drop-down menu, select Report or Mail Merge. The mail merge format generates the report in a tab delimited mail merge format for use in third party software.
Client Name
To run this report for just one client, type in a few letters of the client’s last name and choose name from the drop-down menu.
Client Group
Select a client group that has been created in Utilities|Setup|Groups from the drop-down menu to create a report for a group of clients.
Branch Group
Select a branch group that has been created in Utilities|Setup|Groups from the drop-down menu to create a report for a group of branches.
-
Click Preview to view the report on the screen. (Or click Print to send the report directly to the printer without viewing first.)
Note: A positive balance due represents money the client owes the agency. A negative balance due represents money the agency owes to the client.
|
There is an unusually high balance for the JCT Corporation this week. To determine the circumstances, you view the report in detail format and look at each passenger's name. You see John Smith and are instantly reminded of his two first-class tickets to London. You now understand the reason for the high amount. JCT Corporation wants to be notified when their balance reaches $10,000. You print the Client Balance Report and see they are dangerously close to their limit. You give them a call to determine a course of action. |
Tip for Group Reporting: (There is an Invoice Group column on the Client Balances Detail report. If a client has both Group Vouchers and Individual invoices showing on the Client Balance Report, don’t go back and look at each invoice and voucher. Determine what the client really owes in total for the open invoice, because the Voucher receipts are going toward their Group trip. This should significantly cut research time.)
Vendor Balances
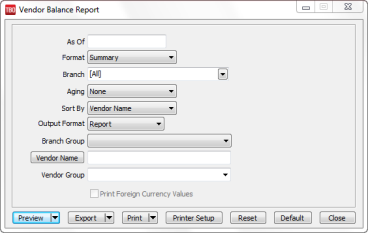
The Vendor Balance report provides a listing of all Vendor-Supplier account balances. (When printing the Vendor Balance reports in detail format, the passenger name from the first booking is included. This aids in remembering the circumstances when seeing a client's name on the vendor balances reports.) Also in detail format, the client name and invoice remarks for vouchers will print.
- Click Reports|Core|Vendor Balances.
- Select settings.
As Of
An As Of date may be specified when the report is generated and the system provides vendor balances as of the specified date by backing out all entries after that date. If the As Of date is left blank, the system generates a current listing of vendor balances including all invoices and payments entered, regardless of date. Double click on the field for a calendar menu.
Format
Summary lists Vendor Name, Invoices Total, Total Unapplied and Balance Due. Detail lists each open invoice for each vendor, including the Invoice #, Branch, Issue Date, and Invoice Amount, Foreign Currency Amount and its code.
Branch
Allows the report to be processed by branch or branches.
Aging
Breaks down balances into four categories: None, 30/60/90; 15/30/45; and 7/14/21 days from the As Of date entered.
Sort By
Sort report by Vendor Name, Vendor ID, or Agent.
Output Format
From the drop-down menu, select Report or Mail Merge. The mail merge format generates the report in a tab delimited mail merge format for use in third party software.
Print Foreign Currency Values
In detailed mode, print out values of foreign currency.
Branch Group
If a branch group has been added under Utilities|Setup|Groups and would like to see all the vendor balances just for that branch group, select appropriate branch group from drop-down menu.
Vendor Name
To run this report for all vendors, leave blank. To run for a specific vendor, type a few letters of the vendor’s name, and choose from the drop-down menu.
Vendor Group
To run this report for a specific vendor group, select group from the drop-down menu.
- Click Preview to view the report on the screen. (Or click Print to send the report directly to the printer without viewing first.)
Note: A positive balance due represents money the vendor owes the agency. A negative balance due represents money the agency owes to the vendor.
ARC/BSP Balances
The ARC/BSP Balances core report searches the system for ARC/BSP invoices open on the Vendor side. These are invoices not yet settled with ARC/BSP. It is designed to include all open invoices including resubmits. This report balances with the ARC Balances account in the General Ledger.
Use the ARC/BSP settlement feature to receive an accurate ARC/BSP Balance Report. The report is only accurate if all of the ARC report net remits have been settled under Payments|ARC/BSP Settlement. (We highly recommend that when entering the ARC/BSP payment, use the ARC/BSP settlement to close the ARC/BSP invoices. If not using the ARC/BSP settlement feature, please continue using the ARC/BSP Reconciliation under the Reports|Invoices|ARC/BSP Reconciliation menu option. The ARC/BSP Balances Report will not be accurate if using this alternative.) Trams Back Office looks for the start date of the first ARC/BSP settlement and includes any open invoices with a resubmit date or issue date prior to the as of date specified.
Check Register
The Check Register provides a listing of checkbook information in a similar format to the statement received from the bank. Report includes the check number, date, Record Number, payee, amount, and remarks recorded within the specified date range. Also included are deposits, EFT Payment Received and Made, and withdrawals.
1. Click Reports|Core|Check Register.
2. Select settings.
|
From/To |
Specify the period for which data will be included in the report. Double click on the field for a calendar menu. |
|
Bank Account |
To select data for a particular bank account, enter that bank account number. |
|
Bank Reconciliation |
All includes all bank items regardless of their cleared status. Cleared includes only cleared items and should match the corresponding Bank Statement. Not Cleared includes only non-cleared items and is the difference between the bank's balance and the book balance. |
|
Start/End Check No |
To see a specific range of checks, enter the starting and ending check numbers here. |
|
Payment Status |
Select All, Valid, or Voided from the drop-down menu. |
|
Output Format |
From the drop-down menu, select Report or Mail Merge. The mail merge format generates the report in a tab delimited mail merge format for use in third party software. |
3. Click Preview to view the report to the screen. (Or click Print to send the report directly to the printer without viewing first.)
Management Summary Report
This report is designed to capture the status of the agency’s business at a glance. All of the vital agency statistics are included in one report.
1. Click Reports|Core|Management Summary.
2. Select settings.
|
From/To |
Specify the period for which data is included in the report. Double click on the field for a calendar menu. |
|
Booking Activity |
Summary by travel type of all the bookings made during the requested time frame. This includes all transactions, such as Commission Track items where the commission has not yet been received. |
|
Income Statement Activity |
Summary by travel type of the revenue realized (received) during the requested time frame. |
|
Client Balances |
Summary of all the money due the agency by its clients, and any money due client by agency in form of Unapplieds or Vouchers. |
|
Vendor Balances |
Summary of all the money due from the agency to its vendors and any refunds due from vendors (accounts payable). |
|
ARC Balances |
Summary of all invoices not yet settled with ARC, ARC payable or received. |
|
Operating Payables |
Summary of all pending operating payables. |
|
Check Register Balances |
Ending balances in the bank accounts. The money on hand. |
3. Click Preview to view the report to the screen. (Or click Print to send the report directly to the printer without viewing first.)
NOTE: Here are how the percentages are determined on this report:
Yield - This percentage is calculated by dividing the commission by the base fare.
Pref. Commission - This is the actual commission earned by the preferred vendors for each travel type.
% Pref. - This percentage is the total commission for each travel type divided by the commission for the preferred vendors.
Pref Yield - This percentage is the commission for preferred vendors divided by the base fare.
Note: There is a Total Base column on this report, The yield percentage is the commission divided by total base.
Invoice Reports
|
The following list shows all the reports related to invoices for ARC/BSP and Management reporting. Note: Bookings are displayed in order of depart date. Bookings with no depart date will be displayed FIRST on the invoice. |
|
|
ARC/BSP |
Weekly ARC/BSP report, arranged to meet ARC/BSP specifications and designed to submit to ARC/BSP along with Auditor coupons (for those not using the option.) |
|
Activity |
Sales activity by travel type in Summary format or by invoice in Detail format for a defined period, including percentages. Results are depicted graphically with optional color charts. |
|
Analysis |
Numerically sorted invoice listing and in-depth analysis of accumulated sales data. |
|
City Pair |
Analysis of Airline Segments by Origin/Destination. |
|
Depart/Arrive Manifest |
Departure and Arrival Manifests. |
|
Invoice Printing |
Print Invoices From Trams Back Office. |
|
TAFP Service Fee |
Print the ARC/BSP TAFP report for Service Fees. |
|
IAR Reconciliation |
Compare Data in Trams Back Office to ARC’s IAR summary file. |
|
ARC/BSP Reconciliation |
Numerically sorted ticket listing. |
ARC/BSP Report
The ARC/BSP Report generates a report conforming to ARC/BSP standards.
1. Click on Reports|Invoice/ARC or BSP.
![]()
2. Select settings.
|
From/To |
Enter the date parameters for the ARC/BSP report. If generating to submit to ARC/BSP, dates should be for the appropriate Monday-to-Sunday time frame. |
|
Authorization No |
Enter authorization number to be used on ARC/BSP report. If field is left blank, Trams Back Office defaults to the recommended procedure of re-arranging the To date by moving the year digits to the front. If the date entered is 6/12/02 and there is no authorization number entered, Trams Back Office defaults to an authorization number of '020612'. |
|
ARC/BSP Number |
Enter the appropriate ARC/BSP Number. Note: Most reports in Trams Back Office have a field for Branch to print reports for any one branch. The ARC/BSP Sales Reports has a field for ARC/BSP number. This provides greater flexibility to group branches using the same ARC/BSP number. Branch numbers are set up in Utilities|Setup, then ARC/BSP Numbers. To access the ARC/BSP Sales Report, go to Reports|Invoice. Highlight ARC/BSP and click on the arrow for a list of ARC/BSP numbers, or enter the eight-digit ARC/BSP number. A report can then be printed for all branches using the same ARC/BSP number. |
|
Included Items (US) |
This field is used for U.S. agencies using Interactive Reporting (IAR). Not using IAR, leave this set to the default of ALL. Click on the arrow to select from IAR Only, Non-IAR only and ALL. IAR Only is the settlement for transactions that are sent to ARC electronically. Non-IAR only is the settlements transactions that are mailed to ARC. |
|
Include Tickets |
Select Include or Exclude with specific UDID. |
|
UDID Selection (US) |
From the drop-down menu select a UDID number, and enter a value in Equals to complete the report selection criteria. |
|
|
BSP Report Selection Criteria: |
|
Included Items (BSP)
|
For BSP Agencies in Canada, choices for including or excluding Auto or Manual Tickets, Refunds, and Refund Exchanges on a report for BSP Canada are All, Automated Only (No Refunds)[Auto Tickets/No Refunds] - for agencies that cannot 'Auto Refund' tickets through their GDS (Galileo);Manual Only (All Refunds/Exchanges)[Manual Tickets/All Refunds + All Exchanges] - for agencies that CANNOT 'Auto Refund' tickets through their GDS (Galileo); Automated Only (Including Refunds)[Auto Tickets + Auto Refunds] - for agencies that CAN 'Auto Refund' tickets through their GDS (Sabre, Amadeus & Worldspan); Manual Only (Including Manual Refunds& All Exchanges) [Manual Tickets/Manual Refunds + All Exchanges] - for agencies that CAN 'Auto Refund' tickets through their GDS (Sabre, Amadeus & Worldspan). Any Auto Refund tickets that must be 'Manually' submitted to BSP, has to be manually lined out of the Automated Only (Including Refunds) Report, and manually 'Added' to the Manual Only (Including Manual Refunds & All Exchanges) Report. This would be for tickets that for whatever reason are not in either the airlines database or the GDS database. |
|
UDID and UDID Value selection field for BSP
|
Use these features for any Auto Refund tickets, that for whatever reason, are not in either the airlines database or the GDS database and must be manually submitted to BSP. As these UDID features are primarily designed for identifying Auto Refund tickets that must be manually submitted to BSP, they do not need to be used by a Galileo Agency that would be using the first two report selections for Automated Only (No Refunds) & Manual Only (All Refunds/Exchanges). For Sabre, Worldspan and Amadeus agencies, make a UDID selection for any auto refund ticket that would normally be included on the Automated Only (Including Refunds) report, but because of special conditions must be processed manually to BSP. This type of refunded ticket can be marked using any UDID # and Value. |
|
UDID and UDID Value selection field for BSP (cont’d)
|
Example: UDID 10 with a value of Manual. Exclude Tickets, UDID 10 and Manual should be selected before running the Automated Only (Including Refunds) report. The refund tickets that either are not in the GDS database or the airline database would NOT show on this Automated Only Report. They would be 'moved' to the Manual Only Report for manual submission to BSP. Include Tickets, UDID 10 and Manual should be selected before running the Manual Only (including Manual Refunds& All Exchanges) report. These refund tickets that either are not in the GDS database or the airline database WOULD show on this Manual Only Report for manual submission to BSP. |

3. Click Preview to view the report on the screen. (Or click Print to send the report directly to the printer without viewing first.)
Note for all users: Cash adjustments should be entered in Invoice|Adjustments.
Weekly (ARC/IAR Sales Report/Reconciliation) Routine
Step 1. Check that the data in the IAR Sales Report matches data in Trams Back Office by one of three methods:
a) Method One: Run a list of all invoices captured in Trams by going into Reports|Invoice|Analysis and verifying that all invoices for the week are accounted for in Trams. Then, run a list of all tickets captured in Trams by going into Reports|Invoice|ARC/BSP Reconciliation and verifying that all tickets issued for the week are accounted for in Trams, and be sure to set ticket status to ALL.
b) Method Two: Download the IAR file from the IAR website. Go to Reports|Invoice|IAR Reconciliation and click the IAR File button to point to the path of the downloaded .txt file obtained from the IAR website. Print out an Exception Report which points out differences between what was submitted to IAR and Trams Back Office.
c) Method Three: Download the IAR file from the IAR website.
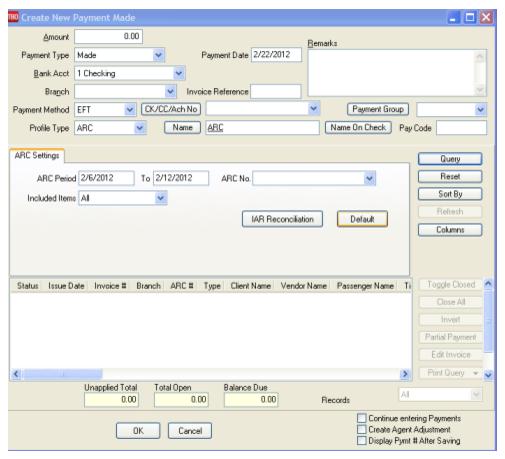
-- Go to Payments|ARC Settlement.
-- Query for the week’s ARC tickets so they are displayed on the settlement screen.
-- Click IAR Reconciliation on the ARC Settlement screen.
-- Click IAR Filename and map to the weekly IAR file.
-- Click Query to see the standard IAR Reconciliation Report.
-- For tickets where Net Remit Do Not Match, Ticket Is Voided in IAR but Not in Trams, or Missing IAR Ticket, click Find Ticket and the cursor lands on the appropriate ticket on the ARC Settlement screen to Edit Invoice as normal.
-- For tickets that are Voided In Trams but Not In IAR, click Find Ticket to go to the booking containing that voided ticket in TBO, to Unvoid it, allowing the ticket to now show correctly on the ARC Settlement Screen.
-- For any exceptions that are Missing Trams Ticket, click off the IAR Reconciliation screen, and manually add the missing tickets. If doing this method, no need to do Steps 3 and 4 below.
Note: This is the same IAR Reconciliation exception report that was only available before under Reports|Invoice|IAR Reconciliation. The IAR Reconciliation from the ARC Settlement screen works the same way and provides that same exception report, but now has linking ability to the tickets displayed on the ARC Settlement Screen.
Step 2. Enter any missing Refunds, Debit Memos, Voids, etc. so Trams Back Office agrees with IAR Sales Report.
Step 3. Submit the IAR Sales Report.
Step 4. Enter and balance the ARC/BSP Settlement for the week under Payments|ARC Settlement. Do this by comparing the amount withdrawn to the amount Trams calculated as the Net Remittance amount for that ARC/BSP week. If the two numbers do not balance exactly, review the ARC/BSP Settlement section of this manual.
If processing through ARC/IAR, complete the ARC Settlement right after submitting the IAR Sales Report. There is no need to wait to receive a Weekly Sales Summary from ARC as the amount submitted to ARC through IAR will not change from what was submitted.

Weekly BSP HOT Reconciliation Routine
A BSP HOT Reconciliation can be found under Reports|Invoice|BSP Reconciliation. To receive a copy of the BSP Report in the HOT file format, contact:
www.IATA.org/customer.
Trams Back Office compares the data in the HOT file to the information in Trams Back Office and generates an exception report which lists all the differences between the Trams Back Office data and the HOT file. Once the transactions on the exceptions reports have been addressed, the BSP Settlement routine can be completed. The Submit to field in the TBO booking must be set to BSP (for both BSP and Web bookings reported via BSP). For web booking exchange transactions, see additional information below.
Note: When reading in the BSP HOT file, the reconciliation routine is filtering on the IATA Number and will only include tickets associated with that IATA Number. Tickets in other IATA numbers do not show on the report as "missing".
Reconciliation Steps:
1. Download the HOT file from the IATA Web Site
2. In TBO, go to Reports/Invoice/HOT Reconciliation
3. Click the HOT File Button and browse to where the file was saved
4. Click the Preview Button
5. Reconcile the Exceptions that appear on the Exception Report
Sample Exceptions:
|
Ticket # |
Inv # |
Exception Reason |
|
7771113333 |
5589 |
Missing HOT Ticket – Ticket is not listed in the HOT file |
|
7771113358 |
5598 |
Missing TBO Ticket – Ticket is listed in the HOT file but cannot be found in TBO |
|
7771113362 |
5600 |
Remittance Amounts do not match – Commission amounts do not match |
|
7771113375 |
5612 |
Total Fares do not match – Ticket amount does not match total fare amount in TBO |
Non automated air web booking exchanges (Air Canada, Westjet, etc.), must contain Trams Descriptor codes to properly flag the transaction as an exchange. The original ticket number must also be added to populate the original ticket field in the booking.
Examples (to be added in addition to other accounting line information):
*EXE – Even exchange
*EXA – Exchange with an add collect
*EXR – Exchange Refund
*OT – Original Ticket number
Sabre
ACOTH1/SUPPLY/DOC/P11/950.00/0/ALL/CK/*SBA*TT1*VCAC*EXE*OT7771113375
Worldspan
AC1-A*TT1*VCAC*EXE*OT7771113375
Apollo
T-MS9A*VCAC*TT1*CM10*CF123456*SG*EXE*OT7771113375
Amadeus
RM*9A*VCAC*TT1*CM10*CF123456*SG*EXE*OT7771113375
Weekly (BSP Sales Report/Reconciliation)
Complete the BSP Settlement after receiving the Weekly Sales Summary from BSP as amounts could be changed from what was submitted.
1. Print an Invoice Analysis Report (Reports|Invoice|Analysis) to verify all invoices issued during the week are entered in Trams.
2. Print a BSP Reconciliation Report (Reports|Core|BSP Reconciliation). Set the ticket status to ALL to verify all tickets issued for the week are entered in Trams.
3. Submit BSP Link report through the Internet. If necessary, print the BSP Report (Report|Invoice|BSP), set the Included Items to Manual, and mail it to the bank.
4. If not using the BSP Link, print the BSP Report (Reports/Invoice/BSP) and mail it to the area bank with the auditors’ coupons from the tickets issued, or verify the cash and credit card totals and period net remit if submitting the report through BSP Link.
5. Reconcile BSP’s Weekly Sales Summary Report by entering the amount of the BSP Withdrawal in Payments|BSP Settlement. Adjust each Trams entry to match BSP’s report and close all bookings paid for in that BSP period.
Sabre Canada BSP Report - Auto Refunds (QREX)
For the BSP Canada version, two more options have been added to BSP Report to allow for Automated Sabre Refunds using the QREX product. BSP Sabre Agencies only, should run the "Automated With Refunds" Report for their Automated BSP transactions submitted to BSP through Sabre and the "Manual Without Refunds" Report for all their Manual BSP transactions sent directly to BSP.
This will be implemented in stages for Sabre users beginning 01 Mar 2004. Sabre will stagger training over a period of 2 to 4 months. Sabre will communicate their training schedule and implementation plan to all their subscribers. IMPORTANT NOTE: Please DO NOT use the Sabre automated refund functionality until receiving the appropriate training from Sabre. Until then, please continue to complete manual Refund notices and submit them to BSP as part of the manual CASH or manual CREDIT CARD sales batch of the weekly report.
All other Non-Sabre agencies using the BSP Canada version should continue using the original "Automated Only" & "Manual Only" Reports. Sabre BSP customers should also use these reports, until they have been trained by Sabre in the use of the QREX product.
"Exceptions" To The REFUND On The "Automated With Refunds" Report
NOTE: Trams has no way of determining this and it is up to the Sabre User to know which tickets can be Auto Refunded through Sabre QREX and which tickets must be Manually submitted to BSP Canada.
All tickets to be Auto Refunded must be in Sabre's database, and for an E-Ticket, it must also be available in the airline's E-Ticket database.
1. Exchanged Ticket:
If a paper ticket, and it is an "Exchange", it CANNOT be Auto Refunded and should be submitted Manually to BSP using our standard "Manual" Report. If the ticket is an E-Ticket and is an "Exchange," it CAN be Auto Refunded and should be submitted using Sabre QREX and our "Automated with Refunds" Report.
2. Partially Refunded Ticket:
If it is 2nd or greater time that the same ticket number has been refunded, it CANNOT be Auto Refunded and should be submitted Manually to BSP using our Standard "Manual" Report.
|
Sunshine Travel Agency has six branches throughout Southern Florida. Mary, the owner, wants to print an ARC/BSP Reconciliation report for her main branch and the three local locations using her same ARC/BSP number. Mary goes to the main Reports menu, then to Invoice, then ARC/BSP Reconciliation. From the ARC/BSP # field, she enters the ARC/BSP number shared by all four locations. This produces the report she needs. |
Invoice Sales Activity Report
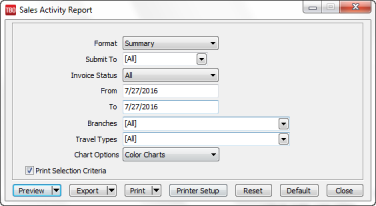
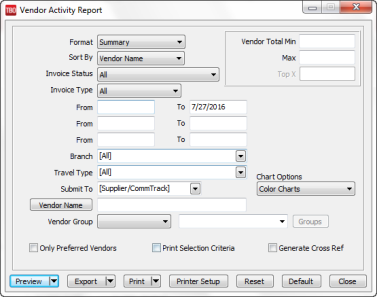
The Invoice Activity Report is used to identify sales information by invoice for a defined date range. The report also breaks down sales and commission by Travel Type and by Submit To.
- Select Reports|Invoice|Activity.
2. Select settings.
|
Format |
Select either Detail or Summary. Detail lists each invoice, with one line per invoice including Invoice #, Issue Date, Client #, Gross Fare, Net Fare and Commission. Summary just shows Total Fare, Net Fares, Commissions and percentages by Travel Type and by Submit To. |
|
Submit To |
Any or All can be selected by putting a check next to the Submit desired. ARC or BSP includes only ARC/BSP transactions. Supplier includes only Supplier transactions. Comm Track includes only Comm Track transactions. |
|
Invoice Status |
Select All, All/ARC/BSP/Supplier/Closed Comtrack, Open, or Closed. By selecting a different Invoice Status, this report can be used for either a Gross Sales Report (All), an Accounts Receivable Report by invoice (Open), or a Receipts Report by invoice (Closed). Note that Invoice Status refers directly to the Submit To field. If Submit To is ARC or BSP/Supplier, Invoice Status refers to whether or not the payment is received from the client. If Submit To is Comm Track, Invoice Status refers to whether or not the commission is received from the vendor. If Submit To is All, Invoice Status refers to both: For ARC or BSP/Supplier bookings whether or not the payment is received from the client, and for Comm Track bookings whether or not the commission is received from the vendor. |
|
From/To |
Enter the date parameters for the sales report. If the Invoice Status is All or Open, this date range refers to the Invoice Issue Date; if the status is Closed, then this range refers to the Client Payment Date for ARC/BSP and Supplier bookings, and to the Vendor Payment Date for Comm Track bookings. |
|
Branches |
Enter the appropriate branch if applicable. Select a branch or a combination of branches. A checkmark indicates the branch will be included in the report. |
|
Travel Types |
Defaults to All Travel Types, but may be changed to process report by one or more specific travel types by clicking on the down arrow and selecting travel type by using a checkmark, or right-mouse clicking and choosing the appropriate Travel Type. |
|
Chart Options |
Use the drop-down menu to select color charts, black and white (B/W) charts, or no charts. |
|
Print Selection Criteria |
Choose to print the selection criteria used to setup this report by checking here. |
3. Click Preview to view the report on the screen. (Or click Print to send the report directly to the printer without viewing first.)
Invoice Analysis
With Invoice Analysis, process reports based on invoice information. This report lists all invoices numerically. Any Invoice # out of sequence is marked with an “*”, and all voided or spoiled invoices appear as Voided.
As in all analysis reports, enter only the selection criteria for the desired report. Multiple selection criteria are allowed.
- Select Reports|Invoice|Analysis.
2. Enter only the selection criteria for the desired report. Multiple selection criteria are allowed.
|
Invoice Analysis |
|
|
From/To |
To select data for a particular period, enter the dates. |
|
Invoice Record No Min/Max |
To select data for a particular invoice record range, enter the lowest and highest record numbers, from 0 to 999999. |
|
Invoice Number Min/Max |
To select data for a particular invoice number range, enter the lowest and highest invoice numbers, from 0 to 999999. |
|
Invoice Total Min/Max |
To select data based on a range of total fare from the invoices. |
|
Commission Total Min/Max |
To select data for a particular invoice commission total, enter the lowest and highest commission amounts, from -999,999.99 to +999,999.00. Note that invoice commission amount includes only ARC/BSP and Supplier bookings on the invoice. |
|
Invoice Valid/Voided |
All (includes all invoices, including voided invoices); Valid excludes voids, Void includes only void. |
|
Branch |
Enter the appropriate branch if applicable. |
|
Branch Group |
Enter the appropriate branch group if applicable. |
3. Click Preview to view the report on the screen. (Or click Print to send the report directly to the printer without viewing first.)
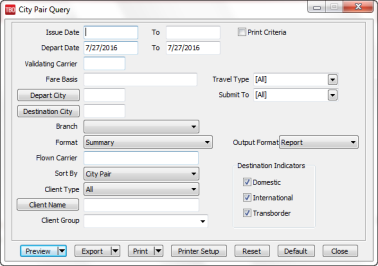
City Pair Report
The City Pair report allows for analysis of Airline business for a specific origin and destination city. This report and the Departure/Arrival report (Reports|Invoice|Depart Arrive Manifest) now better handle refunds and exchanges with duplicate confirmation and ticket numbers. Prior, if there were duplicates, both transactions would be excluded from the report. The logic now works this way:
- For ARC/BSP tickets, the report uses logic to look for a newer booking (later issue date) that references the ticket number as an original ticket. This would indicate that the ticket has been exchanged and is no longer valid.
- It then checks to see if there's either a refund booking (same ticket number, same depart date) or a duplicate sale booking with a later departure date.
- For non-ARC, it checks to see if there's a refund booking with the same confirmation number, depart date, passenger name and vendor name or another sale booking with the same confirmation number, passenger name and vendor name and a later depart date.
- Select Reports|Invoice|City Pair.
2. Select settings.
|
Issue Date From/To |
Enter the date range of the Invoice Issue Date to include on the report. |
|
Print Criteria |
Place a checkmark in the box to see the selection criteria on the printed report. |
|
Depart Date From/To |
Enter the date range of the Booking Departure Date to include on the report. Depart From/To dates can be used in combination with Issue From/To dates to further narrow down the report results. |
|
Validating Carrier |
To include activity for a specific validating airline, enter the airline code. A Validating Carrier Code must be used for either market share analysis formats. |
|
Invoice Type |
Select Invoice Type: All, Sale or Refund. |
|
Fare Basis |
Enter a Fare Basis Code to limit the report to city pairs flown with a specific fare basis. |
|
Travel Type |
Check the travel types to include on the report. |
|
Depart/Destination City |
Depart City is the city that the flight originates from; Destination City is the final city of the flight. Specify just depart or destination, or both. Leave both blank to see a report showing all city pairs. |
|
Submit To |
Check the Submit To(s) to include on the report. |
|
Branch |
To specify a specific branch, enter the branch number or leave blank for all. |
|
Format |
Summary lists one line per city pair, showing the total number of bookings, total fare, etc. Detail shows each booking within a city pair and then sub-total each city pair. Market Share Analysis (must use validating carrier) displays city pairs excluding connections and compares the Validating Carrier segments to all other Carriers. Market Share Analysis by segment includes connections and does not print the total fare values. |
|
Output Format |
Select from a drop-down menu report for a printable version or mail merge to export a delimited file format of the report. |
|
Flown Carrier |
Enter an airline code to include only activity that was flown on a specific airline. |
|
Sort By |
City Pair sorts the report data alphabetically by city pairs. Segment Count or Total Fare selection sorts the report data in descending order on each of those fields. The Market Share Analysis By Segment Report can be run sorted by either City Pair or Segment Count, or Total Fare. |
|
Client Type/Name |
To see a report for a particular Client Type and/or a specific client, select the specific Client Type and/or Client Name. |
|
Profile Group |
Enter a Profile Group name to limit the report to a specific Client group. |
|
Destination Indicators |
Domestic, International, or Transborder indicators are flagged in the invoice booking screen. Check or uncheck any to include or not include on the City Pair Report. |
The City Pair report uses the segment information captured in the Segment Tab within an invoice booking to accurately determine which segment of a flight is the origin, destination, and which is a connection. (In the Segment Screen, the Connection Field is set to 'O' or blank for Origin, and 'X' for Connecting for each segment.) Internal logic is used when running the City Pair report which excludes any tickets that have been fully exchanged or refunded AND/OR partially exchanged or refunded.
3. Click Preview to view the report on the screen. (Or click Print to send the report directly to the printer without viewing first.)
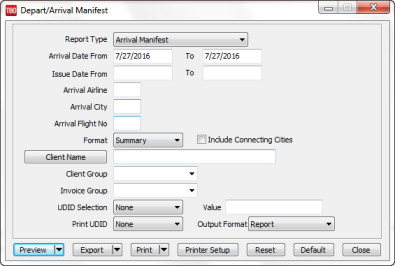
Depart/Arrive Manifest
The departure and arrival manifest is found in the main Reports menu, under Invoices. Select Depart/Arrive Manifest and then Report Type. The Arrival Manifest and the Depart Manifest are two separate reports and cannot be combined. The flight information on these reports is obtained from the Segments section of the Invoice booking screen. If there is no information in the Segments section of the invoice, the arrival and departure does not show on the report.
This report and the City Pair Report (Reports|Invoice|City Pair Report) now better handle refunds and exchanges with duplicate confirmation and ticket numbers. Prior, if there were duplicates, both transactions would be excluded from the report. The logic now works this way:
- For ARC/BSP tickets, the report uses logic to look for a newer booking (later issue date) that references the ticket number as an original ticket. This would indicate that the ticket has been exchanged and is no longer valid.
- It then checks to see if there's either a refund booking (same ticket number, same depart date) or a duplicate sale booking with a later departure date.
- For non-ARC, it checks to see if there's a refund booking with the same confirmation number, depart date, passenger name and vendor name or another sale booking with the same confirmation number, passenger name and vendor name and a later depart date.
- Select Reports|Invoice|Depart/Arrive Manifest.
2) Select settings.
|
Report Type |
Use the drop-down menu to choose either Arrival Manifest (default) or Departure Manifest. |
|
Arrival Date From/To Departure Date From/To |
The date range the group is expected to depart or arrive depending on the report being used. |
|
Issue Date From/To |
The range of dates the tickets were issued for the group. |
|
Arrival/Departure Airline |
Select a specific airline to create the manifests by entering the airline’s 2 letter code. |
|
Arrival/Departure City |
The city the group is departing from if using the Departure Manifest, or the city where the group is arriving for the Arrival Manifest. |
|
Arrival/Departure Flight Number |
Enter the flight number to provide an Arrival or Departure Manifest for only the passengers in the group that are traveling on the same flight. |
|
Format |
Select Summary for the Depart or Arrive date and time, Airline, Flight Number, Itin, and number of passengers. Select Detail to include the passenger names and any remarks. |
|
Client Name |
To see the report for the passengers booked under a specific client, enter the first few letters of the client’s name and select him from the drop-down menu. |
|
Profile Group |
Run the report by Profile group if profile group field was used in each of the profiles for the group. The group name must match the way it was entered in the profile in order for the detail to show on these reports. |
|
Invoice Group |
Run the report by invoice group if the invoice group field was used in the invoice summary for the group. The group name must match the way it was entered in the Invoice summary in order for the detail to show on these reports. |
|
UDID Selection/Value |
Pull information already written. User Definable Interface Data (UDID) are pieces of information attached to a booking for reporting purposes and to help sort or further define the report. Use this information in the Arrival and Departure manifest. UDID’s may be helpful in selecting a report for a specific flight or group if the time is entered as AM/PM. UDID’s allow an agency to add information to a manifest which may be useful for such things as Porter Bag Pulls, Bus Pick-ups, or VIP treatment. Use the UDID Selection field to merely filter the manifest to print only those with the same value in the selected UDID. Use the Print UDID field to print the contents of the UDID on the manifest. To select the VIPs and include the contents of UDID #2 on the arrival manifest, go to the main Reports menu, then to Invoice, then Arrive/Depart Manifest. Enter UDID #1 in the UDID Selection field, and enter VIP in the Value field. This includes only those passengers who are have VIP entered in UDID #1. Enter UDID#2 in the Print UDID field. This prints the contents of this field as entered in the invoice booking screen. Check include connecting cities to run arrival/departure manifest for connecting cities.
|
|
Print UDID |
Pull information already written. |
|
Output Format |
Select from a drop-down menu, report for a printable version or mail merge for a delimited file format of the data. |
3) Click Preview to view the report on the screen. (Or click Print to send the report directly to the printer without viewing first.)
Currently, the manifest reports sort on date, flight, city, and time - if time is entered in Marine Time (e.g. 1:00PM is entered as 13:00).
|
You are sending the Valley High School group to Disney World this summer and want a manifest for your group leader. Access your UDID window clicking on Modify from the booking screen. You want to separate your VIPs, so you use UDID #1 for VIP, and UDID #2 for all special instructions. |
4) To select the VIPs and include the contents of UDID #2 on the arrival manifest, go to the main Reports menu, then to Invoice, then Arrive/Depart Manifest.
5) Enter UDID #1 in the UDID Selection field, and enter VIP in the Value field. This includes only those passengers who are have VIP entered in UDID #1.
6) Enter UDID#2 in the Print UDID field. This prints the contents of this field as entered in the invoice booking screen.
7) Check include connecting cities to run arrival/departure manifest for connecting cities.
8) Click Preview to view the report on the screen. (Or click Print to send the report directly to the printer without viewing first.)
The information used in this feature can be entered from Trams Back Office or by using the interface from the GDS. To review the special entries required to interface this information, please refer to the Trams Back Office Interface Guide for a specific CRS.
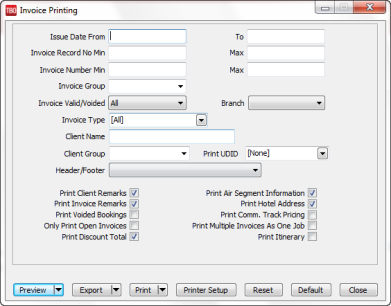
Invoice Printing
With Invoice Printing, print invoices based on invoice information.
Enter only the selection criteria for the desired invoices. Multiple selection criteria are allowed.
- Select Reports|Invoice|Invoice Printing.
2. Enter only the selection criteria for the desired report. Multiple selection criteria are allowed.
|
Issue Date From/To |
To select data for a particular period, enter the dates. |
|
Invoice Record No Min/Max |
To select data for a particular invoice record range, enter the lowest and highest record numbers, from 0 to 999999. |
|
Invoice Number Min/Max |
To select data for a particular invoice number range, enter the lowest and highest invoice numbers, from 0 to 999999. |
|
Invoice Group |
Enter the full Invoice Group name to print invoices for a particular Invoice Group set up in Utilities|Setup|Groups. |
|
Invoice Valid/Voided |
All includes all invoices, including voided invoices; Valid excludes voids, Void includes only void. |
|
Branch |
Enter the appropriate branch if applicable. |
|
Invoice Type |
Pick and choose what Invoice Types to include in the invoice printing. All includes all invoice types, including Sales, Refund, Voucher and Adjustment. Sales includes all sales invoices only. Refund includes all refund invoices only. Voucher includes all vouchers only. To show partial payments on an invoice, include Voucher as an Invoice Type selection. Adjustment includes all debit and credit memos only. |
|
Client Name |
To print an invoice for a specific client, type in a few letters of the client name and choose client from the drop-down menu which appears. |
|
Client Group |
To print an invoice for a specific client group that was set up in Utilities|Setup|Groups, click the group from the drop-down menu. |
|
UDID’s |
Select one or more of the UDID’s in the system to print on under invoice booking as a one-line entry. |
|
Headers/Footers |
Select from the drop-down menu, a header or footer that has been created in Utilities|Setup|Headers/Footers, to create a “Report Footer” that always prints on a separate page, for example print “Terms & Conditions” as a separate Report Footer on a separate page when running an invoice. |
3. Check the following options to include on invoice: Client Remarks, Invoice Remarks, Voided Bookings, Only Print Open Invoices, Air Segment Information, Print Hotel Address, Print Comm Track Pricing, Print Multiple Invoices as One Job, or Print Discount Total. When Print Multiple Invoices as One Job is checked, all invoices displayed are part of a single file for either printing, e-mailing, faxing, or saving. If e-mailing, a single file is created and the recipient only needs to click open the single pdf file and then scroll through or print the multiple invoices contained in the file, instead of having to open multiple pdf files.
When the Print Discount Total is checked, the Gross Fare Total and Discount Total are printed on the invoice using the Face Value and Discount fields from the Expanded Fare Tab of the Booking Screen, if present.
Gross Fare Total: 150.00
Discount Total: -10.00
Invoice Total: 140.00
Payment Total: 0.00
Balance Due: 140.00
4. Click Preview to view the report on the screen. (Or click Print to send the report directly to the printer without viewing first.) You can also Export.
TAFP Service Fee Report - ARC Only
The TAFP report is found in the main Reports menu, under Invoice. This is the service fee processing report for agencies who process their credit card service fees through ARC.
The TAFP complies with ARC standards, providing details of all service charges paid with a client credit card.
The following is the suggested method of entering TAFP transactions into Trams Back Office:
1. Create a Vendor profile called TAFP. (This can be done when entering the service fee booking by typing TAFP in the Non ARC Vendor field, or the profile can be created through the main Profiles menu.)
2. When creating this profile, enter TAFP in the GROUP/BATCH field. This is important.
3. Create a 6000 series expense account called Credit Card Processing Fees.
Now:
4. Enter a Supplier booking with a Travel Type of Svc Fee, the Non-ARC Vendor as TAFP and enter the document number in the Confirmation Number field.
5. Enter the amount of the fee in the Total Fare field.
6. Leave the Tax field blank and enter a commission amount equal to the net amount expected to be received from ARC (presumed to be 96.5% of the Total Fare).
7. Close the supplier booking with a credit card payment. This creates a negative Vendor Balance for the vendor TAFP.
8. At the end of the week run the TAFP report and submit to ARC for the previous Monday to Sunday dates.
9. When processing this report, be sure the Vendor Group field reads TAFP.
Please see Section entitled “Processing TAFP Service Fees” in the Payments chapter for complete instructions.
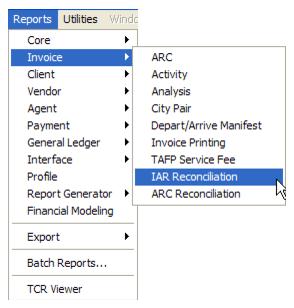
IAR Reconciliation, Method 1
This feature is for U.S. agencies only. The IAR Reconciliation is under Reports in the main menu. Select Reports|Invoice|IAR Reconciliation.
Trams Back Office compares the data in the Sales Summary Report file from ARC to the information in Trams Back Office and generates an exception report which lists all the differences between Trams Back Office data and ARC's data. Once the items that need to be adjusted are known, use that report to make the necessary adjustments before completing the ARC settlement routine.
1. Edit data in IAR.
a) Put tickets in numerical order.
b) Add any debit memos or refunds to IAR.
c) In IAR do a LT - List Transaction and compare each ticket to the LT screen.
d) If modifications are necessary, commission adjustments, adding voids, correction of errors, this can be done from this list.
2. When all tickets have been accounted for, do a LF - List Financial and an IL - to request the data be sent to the www.arccorp.com web site. Copy down the file name from the IL request.
3. Go to Trams Back Office. Reports|Invoice|ARC. Page down to the last page. Compare to the LF screen printed. If everything matches, the report is reconciled and can be submitted. If there is not a match, do an IAR Reconciliation. Here are the procedures.
4. Go to the ARC Web site, www.arccorp.com, click on Back Office Data, continue, insert ARC number and click continue, click on HERE, insert the User Name and Password. This is case sensitive and the information is on the letter received the Friday prior to activation.
5. See the file name when the IL was done in IAR. Right click on the file number. Select, Save Target As. In the Save As dialogue box, select the folder to save the file in. Change the File Name to one that can be found later by date. Give it a file extension of .txt - example 013112.txt.
6. In Trams Back Office, go to Reports|Invoice|IAR Reconciliation. (See alternate method for Reconciling IAR below.
Trams Back Office prompts for a file name. Enter the drive, directory and extension of the file that gets downloaded from the ARC website. If Trams Back Office is having difficulty reading the file name, try renaming the file with an eight-character file name and three-character extension. For example, use the download date or date of the ARC report as a code for the branch with which the file is associated: ar101912.txt.
IAR Reconciliation Report
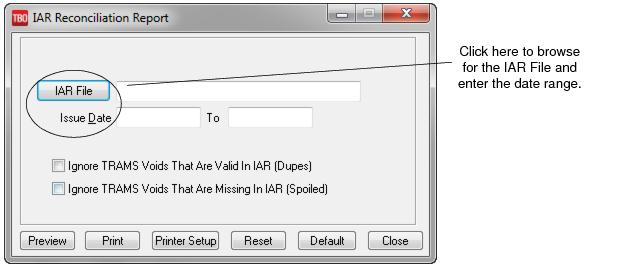
After loading the file, leave blank Ignore Trams Voids That Are Valid in IAR (Dupes), AND Ignore Trams Voids That Are Missing in IAR (Spoiled) if:
- NOT entering IAR (CN) Ghost/Skipped Tickets into TBO as 'Spoiled'.
- NOT interfacing or entering the same ticket number more then once. Some agencies allow for both a non-void and a void instance of the same ticket number, in two invoices on different dates.
|
Ignore Trams Voids That Are Valid In IAR (Dupes) |
Check here if interfacing or entering the same ticket number more then once. Some agencies allow for both a non-void and a void instance of the same ticket number, in two invoices on different dates. |
|
Ignore Trams Voids That Are Missing In IAR (Spoiled) |
Check here if entering IAR (CN) Ghost/Skipped Tickets into TBO as 'Spoiled'. |
Note: If user chooses to enter IAR voided ghost or skipped tickets into TBO as spoiled, those spoiled tickets must be entered on a date that is in the reporting period for the IAR file being reconciled.
Click OK to start the reconciliation. If Trams Back Office returns a blank screen, no changes need to be made and complete the ARC settlement without any corrections. Possible messages generated on the exception report:
Error Messages
|
Message: |
Means: |
|
Missing Trams Back Office Ticket |
The Sales Summary reported a ticket entered in IAR and not entered in Trams Back Office. The Ticket is Voided in IAR, but is not recorded in Trams. |
|
Missing IAR Ticket |
Trams Back Office shows a ticket that does not show on the Sales Summary Report. The Ticket is Voided in IAR, but although the ticket is recorded in Trams, it is not listed as a void. |
|
Net remits do not match |
The ticket shows up in Trams Back Office and in the Sales Summary Report but the Net Remit amounts are not the same amount. Change the Trams Back Office commission amount to equal the Sales Summary Report before completing the ARC Settlement routine. |
|
Ticket is Voided in Trams, but not in IAR |
Single TBO Ticket is voided in TBO, but not in IAR |
|
Ticket is Voided in IAR but not in Trams |
Single TBO Ticket is voided in IAR, but not in TBO |
This is a sample of the Trams Back Office IAR Reconciliation Report:
IAR Reconciliation Report ARC # 123456
Travel Agency From: 03JULxx
Anytown, IL. 11111 To: 09JULxx
|
Ticket No |
Invoice No |
Exception Reason |
|
7771113333 |
5589 |
Missing IAR Ticket - Is voided in IAR, but not in Trams. |
|
7771113358 |
5598 |
Missing IAR Ticket - Is voided in IAR, but not in Trams. |
|
7771113362 |
|
Missing Trams Back Office Ticket. Ticket is Voided in IAR, But not in Trams. |
|
7771113375 |
5612 |
Net remits do not match |
Once these discrepancies are corrected, the LF and Trams Back Office ARC Report should match exactly. Submit the report and know that IAR and Trams Back Office match.
IAR Reconciliation Method 2
Interactive Agent Reporting (IAR) provides a way for agencies to submit their ARC Sales Reports electronically.
This feature is for U.S. agencies only. The IAR Reconciliation is under Reports in the main menu. Select Reports|Invoice|IAR Reconciliation.
Trams Back Office compares the data in the Sales Summary Report file from ARC to the information in Trams Back Office and generates an exception report which lists all the differences between the Trams Back Office data and ARC's data. Once the items need to be adjusted are known, use that report to make the necessary adjustments before completing the ARC settlement routine.
1. Edit data in IAR.
a) Put tickets in numerical order.
b) Add any debit memos or refunds to IAR.
c) In IAR do a LT - List Transaction and compare each ticket to the LT screen.
d) If modifications are necessary, commission adjustments, adding voids, correction of errors, this can be done from this list.
2. When all tickets have been accounted for, do a LF - List Financial and an IL - to request the data be sent to the www.arccorp.com web site. Copy down the file name from the IL request.
3. Go to Trams Back Office. Reports|Invoice|ARC. Page down to the last page. Compare to the LF screen printed. If everything matches, the report is reconciled and it can be submitted. If not matching, do an IAR Reconciliation. Here are the procedures.
4. Go to the ARC Web site, www.arccorp.com, click on Back Office Data, continue, insert ARC number and click continue, click on HERE, insert the User Name and Password. This is case sensitive and the information is on the letter received the Friday prior to activation.
5. See the file name from when the IL was done in IAR. Right click on the file number. Select, Save Target As. In the Save As dialogue box, select the folder to save the file in. Change the File Name to one that can be found later by date. Give it a file extension of .txt - example 013112.txt.
6. Then go to Payments|ARC Settlement.
a. Query for the week’s ARC tickets so they are displayed on the settlement screen.
b. Click IAR Reconciliation on the ARC Settlement screen.
c. Click IAR Filename and map to the weekly IAR file.
d. Click Query to see the standard IAR Reconciliation Report.
- For tickets where Net Remit Do Not Match, Ticket Is Voided in IAR but Not in Trams, or Missing IAR Ticket, click Find Ticket and the cursor lands on the appropriate ticket on the ARC Settlement screen to Edit Invoice as normal.
- For tickets that are Voided In Trams but Not In IAR, click Find Ticket to go to the booking containing that voided ticket in TBO, to Unvoid it, allowing the ticket to now show correctly on the ARC Settlement Screen.
- For any exceptions that are Missing Trams Ticket, click off the IAR Reconciliation screen and manually add the missing tickets.
IAR Reconciliation Method 3
Download the IAR file from the IAR website.
- Go to Payments|ARC Settlement.
2. Query for the week’s ARC tickets so they are displayed on the settlement screen.
3. Click IAR Reconciliation on the ARC Settlement screen.
4. Click IAR Filename and map to the weekly IAR file.
5. Click Query to see the standard IAR Reconciliation Report.
a. For tickets where Net Remit Do Not Match, Ticket Is Voided in IAR but Not in Trams, or Missing IAR Ticket, click Find Ticket and the cursor lands on the appropriate ticket on the ARC Settlement screen to Edit Invoice as normal.
b. For tickets that are Voided In Trams but Not In IAR, click Find Ticket to go to the booking containing that voided ticket in TBO, to Unvoid it, allowing the ticket to now show correctly on the ARC Settlement Screen.
c. For any exceptions that are Missing Trams Ticket, click off the IAR Reconciliation screen, and manually add the missing tickets.
Note: This is the same IAR Reconciliation exception report that was only available before under Reports|Invoice|IAR Reconciliation. The IAR Reconciliation from the ARC Settlement screen works the same way and provides that same exception report, but now has linking ability to the tickets displayed on the ARC Settlement Screen.
ARC/BSP Reconciliation
With ARC/BSP Reconciliation, process reports based on ticket information. This report lists all tickets numerically. Any ticket number which is out of sequence is marked with an “*”. Duplicate ticket numbers are marked with a "#" if they are on different invoices. If there is a duplicate ticket on the same invoice, this is indicated with a "+".
Columns displayed on report are: Ticket No, Invoice Number, Branch, Airline Code, Gross Fare, Commission, Rate and Net Remit and FOP.
1. Click Reports|Invoice|ARC/BSP Reconciliation.
2. Select settings.
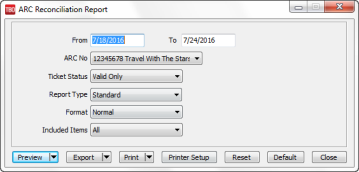
ARC/BSP Reconciliation Report
|
From/To |
Specify the period for which data is included in the report. Double click on the field for a calendar menu. |
|
ARC/BSP No |
Choose appropriate ARC/BSP number from the drop-down menu. |
|
Ticket Status |
From drop-down menu choose, Valid Only, Voided Only, or All. |
|
Report Type |
Specify a Standard Report or a report By Airline from the drop-down menu. |
|
Format |
Select from a drop-down menu, a normal or expanded report format (which includes passenger information, as well as Gross Fare, Commission Amount and Remit Amount). |
|
Included Items |
From drop-down menu, include All items, IAR Only items, or Non-IAR Only items. |
3. Click Preview to view the report to the screen. (Or click Print to send the report directly to the printer without viewing first.)
Client Reports
The following reports are found under Reports|Client menu items:
|
Activity |
Sales Activity, Receivables, or Receipts by client for a defined period. |
|
Statement |
Statement, Client History, or Group reporting with detail. |
|
Lists and Labels |
Client profile data that can be used for creating lists and labels. |
Client Activity Report
- Click Reports|Client|Client Activity.
2. Select settings.
|
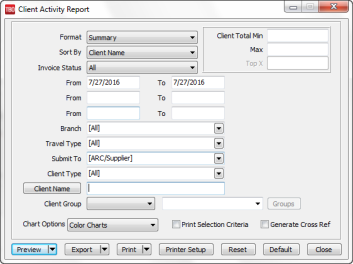
Format |
Choose Summary or Detail. |
|
Sort By |
Use the drop-down menu to select a sort by Client Name, Total Sales, Total Sales by Client Type, Total Commission, or Total Commission by Client Type. |
|
Invoice Status |
Use the drop-down menu to select All invoices, All ARC/Supplier and Closed Comm Track Invoices, Open Invoices, or Closed only. |
|
From/To |
Enter up to 3 ranges of Invoice Dates. |
|
Branch |
Allows the report to be processed by branch |
|
Travel Type |
Select from Travel Types from drop-down menu, or right mouse click to select options. |
|
Submit To |
Use the drop-down menu to indicate ARC, Supplier, and/or Commission Track. |
|
Client Type |
Options include Leisure, Corporate, or All. |
|
Client Name |
Click the Client Name button to launch the profile query screen. |
|
Client Group |
Select with dropdown to include the following operators:
The Groups Button is only enabled if In or Not In are selected. When enabled, it displays a list of Client Groups to select from and allows multiple groups to be selected. |
|
Client Total Min/Max |
Indicate a Minimum/Maximum Invoice Total range. |
|
Color Charts |
Check here if colored charts are desired at the end of the report. |
|
Print Selection Criteria |
Check here to obtain a listing of the filters used to run report. |
3. Click Preview to view the report to the screen. (Or click Print to send the report directly to the printer without viewing first.)
Client Statements
Statements are for billing Clients. A statement shows open invoices. To print a standard billing statement:
- Click Reports|Client|Statement.
2. Select settings.
|
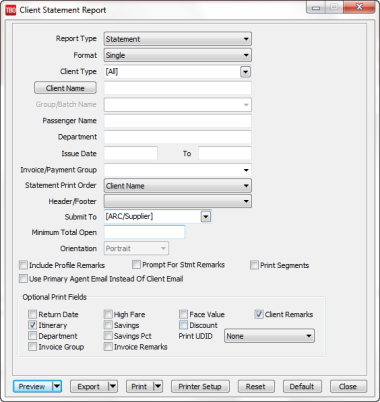
Report Type |
Choose Statement, Statement Wide (includes Arrival and Depart Dates), Summary (invoices for designated period with a payment summary), Summary Wide (includes remarks), and Fare Savings #1(includes fare code fields) from drop-down menu. There is also an option for Statement-Summary which shows a one-line summary for each invoice. With this feature the details for markup lines and service fees are displayed as part of a total invoice amount and not as individual bookings within an invoice. |
|
Format |
Select Single, Group, or Batch (see Group/Batch Name below). |
|
Client Type |
Choose Leisure or Corporate. To print statements for all clients, leave as All. |
|
Client Name |
In the Client Name field, type in a specific client name or leave blank to print for all clients. Query for a desired client by clicking on Client Name. If a single profile is indicated, one report is run. |
|
Group/Batch Name |
If a Group or Batch in the Format field has been selected, type in the specific group or batch name for which the statements are being printed. Selecting Group provides one report for all profiles in the group, whereas selecting Batch provides a separate report for each profile in the group. |
|
Passenger Name |
Statements can be run in Summary format for specific passengers with segments. |
|
Department |
To print this statement for a specific department for a corporate client, type in the department name/number in the Department field. |
|
Issue Date |
Enter up range of invoice dates to include on statement. |
|
Invoice Group |
Use the drop-down menu to indicate a specific Invoice Group. |
|
Statement Print Order |
From the drop-down menu, select the sort for the printed statement - by Client Name or Client ID. |
|
Header/Footer |
Select a header/footer for report from the drop-down menu. |
|
Submit To |
From drop-down menu, indicate ARC, Supplier, and/or Commission Track invoices. |
|
Minimum Total Open |
Enter minimum invoice total here; only statements where the total exceeds the amount set in the field is displayed. (The field is intended to sort through ALL clients and only display those client statements that "exceeds" the minimum amount entered into this field. The field has no effect on a query for a single client or a group of clients. The field is used by agencies to filter our statements when the amount owed is too small to justify processing the statement. Sending a client a statement for $1.45, is not, in the minds of many agencies, worth the effort or possible postage costs.) |
|
Orientation |
Select from Portrait or Landscape from drop-down menu. |
|
Include Profile Remarks |
Check Include Profile Remarks if remarks are desired. |
|
Prompt for Stmt Remarks |
Check here to modify any Statement Remarks on statement. A change here does not change master remarks set up in Global Defaults. |
|
Print Segments |
Check Print Segments field is wanted on document. |
|
Use Primary Agent’s E-mail Instead of Client E-mail |
This option to allow users to e-mail client statements to the Primary agent's e-mail address. A look-up is performed to identify the primary agent in the client profile, then another look-up to that agent's profile to obtain the agent's e-mail address. |
|
Optional Print Fields |
By selecting the items in the optional print fields, there’s flexibility in what gets printed on the Client Statement. Select the landscape mode in the Page Setup to print these additional fields. Warning: Be careful not to check too many fields as 132 characters cannot be exceeded. If the field does not print in landscape mode, it means it has exceeded its printing limit. |
|
Print UDIDS |
Agencies that use UDID's for things that need to appear on a customer statement, like Purchase Order # can add that UDID captured item by clicking on the drop-down menu to select. |
|
Invoice Group |
Check here to include the Invoice Group on the Client Statement. |
|
Invoice Remarks |
Check here to include Invoice Remarks on the client Statement. |
3. Click Preview to view the report to the screen. (Or click Print to send the report directly to the printer without viewing first.)
|
Mary Jones wants you to fax her statements every month. You enter her fax number in her profile. This number appears on Mary's printed statement and is readily available to the person who faxes statements. |
NOTES: An Available Balance Line appears on the Client Statement and is calculated from the Credit Limit field (if it has been entered in the profile) less the amount outstanding on the statement.
Save one or multiple reports to a file or send one or multiple reports via e-mail from the preview screen:
Use the control key and mouse to select the files on the left to save to file, and click the floppy disk icon on the tool bar to save, or send selected files using the e-mail icon. An e-mail address in profile is needed to send an e-mail. If the e-mail program can insert a fax number into the e-mail To field in place of a normal e-mail address, enable the Use Fax option when e-mailing multiple statements.
Fare Savings 1
To produce Fare Savings 1 report set up the Fare Code Table:
1. Click Utilities|Setup|Fare Codes.
2. Click the Fare Code box and type in the Fare Code. (Fare Codes are two-character alphanumeric codes, such as UG, 01, S4, etc.)
3. In the Fare Desc field, type in the description that will correspond to the Fare Code entered (e.g. Upgrade). The description is the fare justification information.
4. Click Add to add the Fare Code to the list.
5. Once all Fare Codes have been added, print the list by clicking Print.
6. When the Fare Codes and Descriptions have been entered, click OK to save.
Example Codes:
01 - Saturday Night Stay 06 - 14-Day Advance required
02- Connecting flight 07 - 07-Day Advance required
03 - First Class 08 - Minimum Stay
04 - Business Class 09 - Season Fare
05 - Coach 10 - Time of Day Travel
Now identify the codes within the invoice booking in the Expanded Fare Information screen.
1. Create sales invoice as usual.
2. Click the Expanded Fare Info tab.
3. In the Fare Savings Info section of the screen, type in the High Fare or Low Fare (or both if applicable).
4. Click Fare Code to view the Fare Code Table and select the appropriate code.
Note: If interfacing, enter the fare savings amounts and codes in accounting lines in the PNR on the CRS. (See the Interface Guide for formats.)
To Print Fare Savings Reports
1. Click Reports|Client|Statement.
2. In the Report Type field, click the arrow and choose Fare Savings 1.
3. Complete the rest of the fields as usual.
4. Click Preview to view the report on screen. (Or click Print to send the report directly to the printer without viewing first.)
NOTE: There is also a Fare Savings Report in Report Generator that can be modified. To view this report, click Reports|Report Generator|Print Report. The report is called Client Fare Savings (CL_FS_D).
Client Lists and Labels
(See Lists and Labels under Reports|Profile.)
|
The following reports are found under the Reports|Vendor menu options: |
|
|
Activity |
Sales Activity, Receivables, or Receipts by vendor for a defined period. |
|
Statement |
Statement or Vendor History with detail. |
|
Lists & Labels |
Vendor profile data that can be used for lists and labels. |
Vendor Activity Reports
1. Click Reports|Vendor|Vendor Activity.
2. Select settings.
|
Format |
Choose Summary or Detail. |
|
Sort By |
Use the drop-down menu to select a sort by Vendor Name, Total Sales, or Total Commission (this last readily rank vendors by commission yield, or total dollars the agency received from the vendor, rather than the dollars paid the vendor.) |
|
Invoice Status |
Use the drop-down menu to select All invoices, All ARC/Supplier and Closed Comm Track Invoices, Open Invoices, or Closed only. |
|
From/To |
Enter range/s of Invoice Dates. Additional date range options to the Vendor Activity report can compare vendor activity for the same vendor to another date range in the Vendor Activity Report (year to year, year to date, month to month, day to day). |
|
Branch |
Allows the report to be processed by branch |
|
Travel Type |
Select from 25 Travel Types from drop-down menu, or right mouse click to select options. |
|
Submit To |
The Vendor Activity report includes ARC/BSP as well as supplier and commission tracking type bookings. Choose any combination of these from the drop-down menu. |
|
|
You want to see the commission earned on your tour business for Preferred vs. Non-preferred. Print a Vendor Activity report, set the Submit To field to Supplier, and the Travel Types field to both tour-dpst and tour-finl. |
|
Vendor Name |
Click the Client Name button to launch the profile query screen |
|
Vendor Group |
Vendor Group field with a dropdown to include the following operators:
NOTE: The Groups Button is only enabled if In or Not In are selected. When enabled, it displays a list of Client Groups to select from and allows multiple groups to be selected. Additionally the multiple date range fields will work when using the new Vendor name or Vendor group fields. |
|
Vendor Total Min/Max |
Indicate a Minimum/Maximum Invoice Total range. |
|
Color Charts |
Check here for color charts at the end of the report. |
|
Print Selection Criteria |
Check here for a record of filters used to run report. |
|
Only Preferred Vendors |
When placing a check mark in the option, the report returns results only for Vendors that have the preferred vendor box checked in the profile. The preferred vendors are indicated with an asterisk in both the standard and wide formats of the report, parallel to how preferred clients look on the Client Activity reports. |
|
Generate Cross Ref |
By checking this box, Trams Back Office retains the vendor information for use when printing out labels. Go to Reports|Vendor|Lists and Labels, choose labels as Report Type, and check the box Use Cross Reference. The labels printed are the names selected when the Vendor Activity report was set up. |
3. Click Preview to view the report to the screen. (Or click Print to send the report directly to the printer without viewing first.)
NOTE: The asterisk on the Vendor Activity Reports indicates Preferred Vendors.
Vendor Statements
Statements are for billing Vendors. A statement shows open invoices.
|
Your agency has just signed a commission override plan with American Airlines. Since this plan is based on productivity, you print a weekly Vendor Analysis report and change the Submit To field to ARC/BSP. This report provides you with total number of invoices per air carrier, the gross amount, the commission amount, and the net remit amount. |
To print a standard billing statement:
1. Click Reports|Vendor|Statement.
2. Select settings.
|
Report Type |
Choose Statement, Statement Wide (includes Arrival and Depart Dates), Summary, and Summary Wide (includes Arrival and Depart Dates) from drop-down menu. |
|
Vendor Name |
In the Vendor Name field, type in a specific name or leave blank to print for all vendors. Query for a desired vendor by clicking on Vendor Name. If a single vendor is indicated, one report is run. |
|
Group/Batch Name |
Having selected Group or Batch in Format field, type in the specific group or batch name for which the statements are printing. One report is run for each vendor in the group. |
|
Issue Date |
Enter up range of invoice dates to include on statement. |
|
Invoice Group |
Use the drop-down menu to indicate a specific Invoice Group. |
|
Latest Depart Date |
Enter the latest depart date to use for the invoice selection. |
|
Invoice Type |
Select All, Incoming or Outgoing from drop-down. (Separate invoices by those that the agency owes to the Vendor, a true payable, vs. receivables the agency is owed by the Vendor. |
|
Branch |
From drop-down menu, choose the appropriate branch/s for which to print statements. |
|
Travel Type |
From drop-down menu, choose the travel type for which to run these statements. Run unpaid commission statements without having to group all hotel profiles together. |
|
Submit To |
From drop-down menu, indicate ARC, Supplier, and/or Commission Track invoices. |
|
Minimum Total Open |
Enter minimum invoice amount - only statements where the total exceeds the amount set in the field is displayed. (The field is intended to sort through ALL vendor profiles and only display those vendor statements that "exceeds" the minimum amount entered into this field. The field has no effect on a query for a single vendor or a group of vendors. The field is used by agencies to filter our statements when the amount owed is too small to justify processing the statement. Sending a vendor a statement for $1.45 commission due, is not, in the minds of many agencies, worth the effort or possible postage costs.) |
|
Header/Footer |
Put the default header/footer on the vendor statements, select it from drop-down menu, otherwise leave blank to print nothing. |
|
Orientation |
A Statement defaults to Portrait orientation, while a statement-wide format defaults to Portrait, but select Landscape from the drop-down menu if desired. |
|
Optional Print Fields |
Check any of the options to print on the statements: Invoice Number, Itinerary, Vendor Remarks, ARC No., or Return Date. |
|
Print UDIDS |
If UDIDS are used such as vendor codes specific to the agency, choose a UDID from the drop-down menu for this to appear on statement. |
|
Prompt for Stmt Remarks |
Check here to modify any Statement Remarks on statement. A change here does not change master remarks set up in Global Defaults. |
|
Include Profile Remarks |
Specific profile remarks from the Profile Marketing Tab can be printed on statements. |
|
Print Foreign Currency Values |
Check here to print out foreign currency amounts and codes for those items automatically populated through GDS interface, like foreign hotels booked through the GDS. |
3. Click Preview to view the report to the screen. (Or click Print to send the report directly to the printer without viewing first.)
NOTE: Save one or multiple reports to a file or send one or multiple reports via e-mail from the preview.
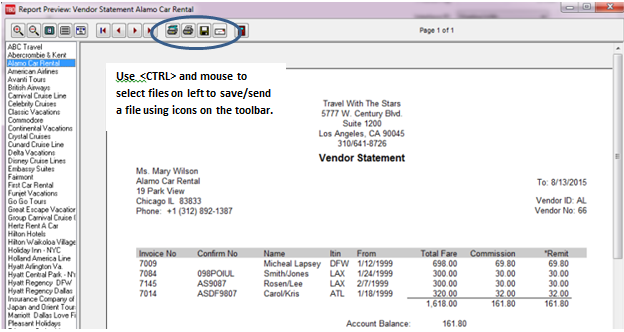
Use the control key and mouse to select the files on the left, and click the floppy disk icon on the tool bar to save, or send selected files using the e-mail icon. The profile must have an e-mail address in it to send it via e-mail.
Vendor Lists and Labels
(See Lists and Labels under Reports|Profile.)
Agent Reports
|
The following reports are found under the Reports|Agent menu option: |
|
|
Activity |
Sales Activity, Receivables, or Receipts by agent for the period defined. |
|
Statement |
Detailed statement for selected agent for the period defined. |
|
IC Export |
Used by HOST agency to create a mailmerge file that can be used by IC with TBO to reconcile Host Commissions. |
Agent Activity Report
1. Click Reports|Agent|Agent Activity.
2. Select settings.
|
Format |
Choose Summary or Detail. When printed in Summary format, the Agent Activity Report lists the total number of invoices, number of bookings, total fare on those invoices, the agency's commission, the agent's commission, and the agent's “share” of the total fare, and total agency commission in the last two Productivity columns. If two agents work on a cruise booking together, their “share” of this booking, or productivity is split 50/50. This may not be their agent commission percentage. Agent #1 may be an inside agent making 0% commission, and Agent #2 may be an outside agent making a 25% commission. These amounts appear in the Agent Commission Column. More data helps to better analyze agents' performance. |
|
Travel Type |
Use the drop-down menu to select any combination of Travel Types or by right mouse clicking in this field. |
|
ARC Non-CC |
From drop-down menu, select Issue Date, Client Pymt Date, Vendor Pymt Date or Exclude. (Recommend Client Pymt Date.) |
|
ARC Client Status |
From drop-down menu, select All, Open or Closed. |
|
ARC CC |
From drop-down menu, select Issue Date, Client Pymt Date, Vendor Pymt Date or Exclude. (Recommend Issue Date or Vendor Pymt Date.) |
|
ARC Vendor Status |
From drop-down menu, select All, Open or Closed. |
|
ARC Debit/Credit Memos |
From drop-down menu, select Issue Date, Client Pymt Date, Vendor Pymt Date or Exclude. (Recommend Issue Date.) |
|
Supplier Non-CC |
From drop-down menu, select Issue Date, Client Pymt Date, Vendor Pymt Date or Exclude. (Recommend Vendor Pymt Date.) |
|
Supplier Client Status |
From drop-down menu, select All, Open or Closed. |
|
Supplier CC |
From drop-down menu, select Issue Date, Client Pymt Date, Vendor Pymt Date or Exclude. (Recommend Vendor Pymt Date.) |
|
Supplier CC No Remit |
From drop-down menu, select Issue Date, Client Pymt Date, or Exclude. (Recommend Client Pymt Date.) |
|
Supplier Vendor Status |
From drop-down menu, select All, Open or Closed. |
|
Comm Track |
From drop-down menu, select Issue Date, Client Pymt Date, Vendor Pymt Date or Exclude. (Recommend Vendor Pymt Date.) |
|
Comm Track Vendor Status |
From drop-down menu, select All, Open or Closed. |
|
From/To Dates |
Enter date range of invoices to use in report. |
|
Branch |
Allows the report to be processed by branch. |
|
Branch Group |
Allows the report to be processed by branch group. |
|
Agent Status |
Select All, Inside, or Outside. |
|
Agent Recon Status |
Select All, Not Cleared or Cleared (used with Agent Reconciliation feature). |
|
Agent Action |
Select Is Blank, Booking or Ticketing. |
|
Preferred Vendor Status |
From drop-down menu, select All, Preferred, or Non-Preferred. |
|
Agent Name |
To run report for just one agent, type in a few letters of agent name and choose off the drop-down menu. |
|
Agent Group |
Select the Agent group from the drop-down menu. |
|
Print Selection Criteria |
Check here to print out the report selections. |
|
Output Format |
Select Report or Mailmerge from the drop-down menu. |
3. Click Preview to view the report to the screen. (Or click Print to send the report directly to the printer without viewing first.)
NOTE: When looking at the actual Agent Activity Report, the Fare Productivity Column is the total fare divided by the number of agents on the invoice. The Commission Productivity Column is the total commission divided by the number of agents on the invoice.
|
Mary Smith, your outside agent, did a cruise booking for $1000 in the month of April. Mary earns a 35% commission on her bookings. She called the reservation in to your office. It was entered into the GDS by your inside agent, Susan. Susan is paid a salary and makes 0% commission on her bookings. When you print the Salesagent Activity report for all of your agents (both inside and outside) you notice that the $1000 fare appears for both of them in the Total Fare column, the $100 commission appears for both of them in the Commission column. Mary's 35% commission ($35.00) appears in the Agent Commission column, Susan has a zero amount in the Agent Commission column because she is paid a salary. But, because they both worked on the same booking, the productivity columns divides the full fare and the full commission by the number of agents, giving each of them a $500 full fare productivity credit, and a $50 commission productivity credit. Jay Jackson, an outside agent, orders champagne for his client's honeymoon cruise. When entering the cruise in Trams Back Office, go the top of the booking screen to the field called Agents. Click and open the commission box. After entering Jay's 35% commission for the cruise booking, you make another entry for a negative $-25.00 and use the remarks field, letting Jay know you are charging him for the champagne. You notice Jay used a preferred vendor, so you added a $10 bonus. |
Agent Commission Detail on Sales Invoice
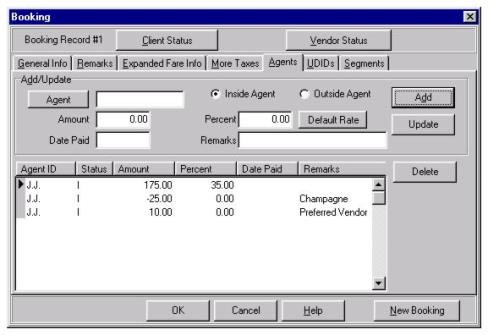
To review the special entries required to interface this information, please refer to Trams Back Office Interface Guides in this manual for a specific GDS.
Agent Statements
Agent Statements provide sales production information for an agent, and can be used to determine what to pay commissioned agents. The Agent Statement settings are designed to report commission due to the agent only after the agency has received and recorded payment from the client/vendor. Following the recommended settings eliminates paying an agent more than once for the same booking.
To print a Commission Due report (commission payable to agent), we suggest the following procedures:
To print a standard billing statement sorted by invoice date:
1. Click Reports|Agent|Statement.
2. Select settings.
|
Agent Name |
In the Agent Name field, type in the agent’s name/code or leave blank to print statements for all agents. To query for a specific agent, click Agent Name. |
|
Agent Group |
Group statements can be run using the group/batch field on agent profiles. |
|
Format |
From drop-down menu select summary or detail (which is suggested format). |
|
Travel Types |
Use the drop-down menu to select any combination of Travel Types or by right mouse clicking in this field. All is recommended. |
|
ARC Non-CC |
From drop-down menu, select Issue Date, Client Pymt Date, Vendor Pymt Date or Exclude. (Recommend Client Pymt Date.) |
|
ARC Client Status |
From drop-down menu, select All, Open or Closed. |
|
ARC CC |
From drop-down menu, select Issue Date, Client Pymt Date, Vendor Pymt Date or Exclude. (Recommend Issue Date or Vendor Pymt Date.) |
|
ARC Vendor Status |
From drop-down menu, select All, Open or Closed. |
|
ARC Debit/Credit Memos |
From drop-down menu, select Issue Date, Client Pymt Date, Vendor Pymt Date or Exclude. (Recommend Issue Date.) |
|
Supplier Non-CC |
From drop-down menu, select Issue Date, Client Pymt Date, Vendor Pymt Date or Exclude. (Recommend Client Pymt Date.) Service fees and any zero net remit invoices are not displayed on the statement with Vendor Payment Date selected. |
|
Supplier Client Status |
From drop-down menu, select All, Open or Closed. |
|
Supplier CC |
From drop-down menu, select Issue Date, Client Pymt Date, Vendor Pymt Date or Exclude. (Recommend Vendor Pymt Date.) |
|
Supplier Vendor Status |
From drop-down menu, select All, Open or Closed. |
|
Supplier CC No Remit |
From drop-down menu, select Issue Date, Client Pymt Date, or Exclude. (Recommend Client Pymt Date.) |
|
Comm Track |
From drop-down menu, select Issue Date, Client Pymt Date, Vendor Pymt Date or Exclude. (Recommend Vendor Pymt Date.) |
|
Comm Track Vendor Status |
From drop-down menu, select All, Open or Closed. |
|
From/To Dates |
Enter date range of invoices to use in report. Note: If using departure dates, Debit Memos will not be included. |
|
Branch |
Allows the report to be processed by branch |
|
Branch Group |
Select a Branch Group from the drop-down menu. |
|
Agent Status |
From drop-down menu, select All, Inside, or Outside. |
|
Agent Recon Status |
Select All, Not Cleared or Cleared (coming from the Agent Reconciliation feature. |
|
Include Agent Adjustments |
From drop-down menu, select YES or NO. |
|
Preferred Vendor Status |
From drop-down menu, select All, Preferred, or Non-Preferred. |
|
Depart Date From/To |
Enter date range of invoices to include in statement. |
|
Agent Action |
From the drop-down menu, select Ticketing or Booking Agent. |
|
Header/Footer |
Select a customized header/footer from the drop-down or leave blank. |
|
Print Selection Criteria |
Check here to print out report selections. |
|
Include Profile Remarks |
Check here to print profile remarks on statement. |
|
Include Travel Type Summary |
Check here to print Travel Type Summary on statement. |
3. Click Preview to view the report to the screen. (Or click Print to send the report directly to the printer without viewing first.)
NOTES:
- Although Trams Back Office provides the ability to print Agent Statements by Departure and Arrival Dates, we do not recommend this method for the following reasons:
- Client and Vendor Payment Dates are reconciled against bank statements or ARC/BSP reports or both. Departure and Arrival Dates are never reconciled which means they can be fictitious or altered.
- Travelers can request refunds after the departure date.
- Client and Vendor Payments can (and do) occur after departure dates.
b) By selecting the option Closed in the ARC/BSP Vendor Status field, it is likely to get a blank report, but there is an not an error. Why? Because an ARC/BSP Vendor Status field of Closed, means the bookings were marked closed using the ARC/BSP Settlement routine.
c) Save one or multiple reports to a file or send one or multiple reports via e-mail from the preview screen. Use the control key and mouse to select the files on the left, and click the floppy disk icon on the tool bar to save, or send selected files using the e-mail icon. The profile must have an e-mail address in it to send it via e-mail.
d) Notice the Summary by Travel Type at the end of this report. Agents can see a summary of their activity by Travel Type like it is displayed in the Sales Activity Report.
IC Export
The IC Export is used by a HOST agency and contains CC and any possible Cash/Check Commissions due to the IC, along with any Fee Invoice charged the IC. This export creates a report or a mailmerge file which can be used by an IC with TBO to reconcile its Host Commissions as it would do for PayMode/Pegasus Commissions. The Host should include this file with a copy of the Crystal Report for Host Commissions Paid less any fees charged, along with the IC's Payment Check.To print a standard billing statement:
1. Click Reports|Agent|IC Export.
2. Select settings.
|
IC Code |
Select the IC Code from the drop-down menu for the IC for which this file is being produced. |
|
ARC/Supplier Non-CC |
From drop-down menu, select Issue Date, Client Payment Date, Vendor Payment Date, or Exclude. |
|
ARC/Supplier CC |
From drop-down menu, select Issue Date, Client Payment Date, Vendor Payment Date, or Exclude. |
|
Comm Track |
From drop-down menu, select Issue Date, Vendor Payment Date, or Exclude. |
|
From/To Dates |
Enter a date range for which to run this report/file. |
|
Output Format |
Select Report or Mail Merge from the drop-down menu. |
3. Click Preview to view the report to the screen. (Or click Print to send the report directly to the printer without viewing first or to name or direct the path for the Mail Merge file.)
Payment Reports
The following are reports listed under the Reports|Payment menu option:
|
Receipts |
History of receipts. |
|
Disbursements |
History of disbursements. |
|
Payment Analysis |
History of payments. |
|
Check Writer |
Print Checks. |
|
CC Merchant |
List CC Merchant Transactions. |
|
Credit Card Reconciliation |
Print out an exception report highlighting the differences between Trams Back Office credit card transactions and a data file that is received from Visa, MasterCard, Diner’s Club, AMEX, AAUATP or DLUATP. |
|
Group Revenue |
Analyze the profit for a group on one report. |
|
Operating Payables |
History of Operating Payables. |
|
ACH Export |
Create a file for handing off ACH payment data to a bank or other Payment Distribution Service. |
|
Audits |
Captures information when the full credit card was viewed based on the user logged in at the time the full credit card number was viewed. |
Receipts
The Receipts report provides a history of receipts. To print the Receipts report:
1. Click Reports|Payment|Receipts.
2. Select settings.
|
Receipts From/To Date |
Enter a range of receipt dates. |
|
Payment Method |
From drop-down menu select any combination of payment methods including Cash, Check, CC, Other, CC Merchant and/or EFT. |
|
Received From |
From drop-down menu select any combination of received from including All, Client, Vendor - ARC, Vendor - Supplier, Vendor - Commission Track, Agent and/or Other. |
|
Bank Account No. |
From drop-down menu, select a bank account for the Receipts report. |
|
Remarks |
Input remark from a specific receipt/s to call up those receipts in report. |
|
Sort by |
Sort the report by either Payment Date or Profile ID. |
|
Output |
Select from drop-down menu, Report or Mailmerge format. The mailmerge format can be used with MS Excel or similar software. |
|
Orientation |
From the drop-down, select Portrait or Landscape. |
3. Click Preview to view the report to the screen. (Or click Print to send the report directly to the printer without viewing first.)
Disbursements
The Disbursements report provides a history of disbursements.
To print the Disbursement report:
1. Click Reports|Payment|Disbursements.
2. Select settings.
|
Payment From/To Date |
Enter a range of payment dates. |
|
Payment Method |
From drop-down menu select any combination of payment methods including Cash, Check, CC, Other, CC Merchant and/or EFT. |
|
Paid To |
Check or uncheck from the drop-down menu: Client, Vendor - ARC, Vendor - Supplier, Vendor - CommTrack, Agent, Other (default is All). |
|
Bank Account No. |
From drop-down menu, select a bank account for the Receipts report. |
|
Remarks |
Input remarks from a specific disbursement/s to call up those disbursements in report. |
|
Sort by |
Sort the report by either Payment Date or Profile ID, or Check/CC #. |
|
Output |
Select from drop-down menu, Report or Mailmerge format. The mailmerge format can be used with MS Excel or similar software. |
|
Orientation |
Select Portrait or Landscape from the drop-down. |
3. Click Preview to view the report to the screen. (Or click Print to send the report directly to the printer without viewing first.)
Payment Analysis
The Payment Analysis report provides a history of payments.
To print the Payment Analysis report:
1. Click Reports|Payment|Payment Analysis.
2. Select settings.
|
Payment Type |
From drop-down menu select any combination of payment types including Received, Made, Deposit, and/or Withdrawal. |
|
Payment Method |
From drop-down menu select any combination of payment methods including Cash, Check, CC, Other, CC Merchant and/or EFT. |
|
Payment From/To Date |
Enter a range of payment dates. |
|
Payment Rec No |
Enter a specific payment record number to call up that in report. |
|
Invoice Rec No |
Enter a specific invoice record number to call up that in report. |
|
Remarks |
Input remark from a specific payment/s to call up those payments in report. |
|
Profile Type |
From drop-down menu select any combination of profile types including All Clients, All, Leisure, Corporate, Vendor, Agent and/or Other. |
|
Profile Name |
In the Profile Name field, type in a specific name or leave blank to print for all profiles. Query for a desired client by clicking on Profile Name. |
|
Profile Group |
Enter a specific profile group, selecting from the drop-down menu. |
|
Payment Group |
Enter a specific payment group, selecting from the drop-down menu. |
|
Bank Acct |
Select a specific bank account for which to run this report, or leave blank to run for all. |
|
Branch |
Select a specific branch for which to run this report, or leave blank to run for all. |
|
CC/Check # |
To run the report for a specific credit card or check number, input number here. |
|
Payment Status |
From the drop-down menu, select All, Valid, or Voided. |
|
Name on Check |
Query for a check based on the Name on Check rather than the Profile Name. |
|
Sort by |
Determine the sort of the report by choosing Date,Name or Ck/CC No. from drop-down menu. When sorted by name items are subtotaled. |
|
Subtitle |
Add more description to this report for handoff. |
|
Output format |
Select report or mailmerge from the drop-down. |
|
Only Unapplied |
Check this box if to select Only Unapplied payments. |
|
Print Journal Entries |
Check this box if to print journal entries. |
3. Click Preview to view the report to the screen. (Or click Print to send the report directly to the printer without viewing first.)
Check Writer
Print out checks using the check writer.
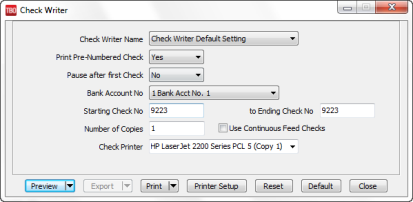
To print checks:
1. Click Reports|Payment|Check Writer.
2. Select settings.
|
Check Writer Name |
From the drop-down menu select which check writer setting to use. When setting up the check writer in Utilities|Setup|Checks, set up as many check settings as are needed. For example, one for payroll checks, one for normal disbursements, etc. |
|
Print Pre-Numbered Check |
From drop-down menu select Yes or No. |
|
Pause after first Check |
From drop-down menu select Yes or No. |
|
Bank Account |
From drop-down menu select bank account these checks are written from. |
|
Starting/Ending Check No |
This field is defaulted to the next check number available; or enter a range of checks to print. |
|
Number of Copies |
Enter number of copies of check to be printed. |
|
Check Printer |
From drop-down menu, select printer. |
|
Print Continuous Feed |
Check this box for continuous feed checks. |
|
Print Preview |
Check this box to preview checks before printing. |
3. Click Preview to view the report to the screen. (Or click Print to send the report directly to the printer without viewing first.)
NOTE: The starting check number does not default if Print Pre-Numbered Checks is set to YES. If printing multiple checks, we would not know which check number to default to. If printing one check at a time, it is easier and quicker to print those checks from the Payment Query screen.
CC Merchant Report
The CC merchant report summarizes the credit card transactions to view the impact those transactions have on the bank account
CC Merchant Report is under the Reports|Payment|CC Merchant menu options. This report currently supports American Express, Diner’s Club, MasterCard, Discover, and Visa. Click the drop-down arrow on Included CC’s and select the credit card(s) to include. Click OK.
To print the CC Merchant Report:
1. Click Reports|Payment|CC Merchant.
2. Select settings.
CC Merchant Report Selection Criteria
|
From/To Date |
Enter a date range for this report. |
|
Bank Account |
From the drop-down menu, select bank account these checks are written from. |
|
Included CC’s |
Use the drop-down menu to select any combination of credit cards: American Express, Diner’s Club, Discover, MasterCard, Visa and/or Other. |
|
Format |
From drop-down menu, select Report or Mail Merge. |
|
Status |
From drop-down menu, select All, Cleared or Not Cleared. |
|
Branch |
Select the branch from the drop-down menu. |
- Click Preview to view the report to the screen. (Or click Print to send the report directly to the printer without viewing first.)
|
The Upper Peninsula Travel Agency has Credit Card Merchant Accounts with Visa and MasterCard. At the end of each day the bookkeeper, Lars, runs a CC Merchant report showing the total activity affecting the bank account. Lars makes a payment received from the CC company via EFT, and it is journalized as a debit to Cash in Bank and a credit to CC Merchant receivables accounts. At the end of the month, Lars runs the End of Period, which clears out the CC Merchant receivables account by debiting the account and crediting the client balances. When the agency reconciles their bank statement, they enter any CC service charge as payments made to the CC company, with a pay method of EFT, and journalize the payment as a debit to CC Service Fees and a credit to Cash in Bank. |
Credit Card Reconciliation
The Credit Card Reconciliation report is an exception report that compares a data file provided by a credit card company for Visa, MasterCard, Diner’s Club, AMEX, AAUATP or DLUATP with transactions that exist in Trams Back Office. Look on the credit card website to learn how to obtain the data file.
For American Express, this feature is used to highlight the differences between files that are received from American Express about a specific agency corporate client and its travel charges made with American Express. The transactions are Airline tickets processed through ARC with a payment type of CC and a Amex card number. American Express has several file types and several delivery methods. The file received from American Express must be the dtail3a.prn file which American Express may also refer to it as a Recon D (KR1002) in ASCII format.
To obtain this file, contact the American Express MIS Department at 800-542-0995. Request the CSV format using a delivery method of diskette. The diskette ordered in the CSV format should be a dtail3a.prn file. Some agencies have larger files that cannot be put on a single diskette. Ask about downloading this dtail3a.prn file for use in TBO.
Special Note to Worldspan Users: The Credit Card Reconciliation functionality has changed for Worldspan users, so that Service Fee tickets (Airline=XD) where the ticket number is not starting with 81 or 19 are handled differently. ARC recently made a change to Travel Agency Service Fee (TASF) transactions submitted through the Worldspan GDS. The agencies client credit card statements show the same document number for the TASF charge as for the airline ticket number, when the TASF is issued at the same time the airline ticket is purchased. If the TASF is not related to an airline ticket purchase the credit card statement will continue to show an MCO number.
This change was made in response to numerous requests from travel agencies, especially those that service corporate accounts, to match the TASF transaction with the corresponding air ticket on the client's credit card statement thereby helping them with their corporate accounting and allocation function. When Worldspan agencies use the Credit Card Reconciliation function in TBO, the CC Company file that is used for the reconciliation contains the associated airline ticket number and we will now match to that ticket number in the CC file and not the MCO ticket number as we previously did. We also display the MCO ticket number in the "Exception" Column on the "Valid" Report.
Steps for Running the Credit Card Reconciliation
- Go to Reports|Payments|Credit Card Reconciliation.
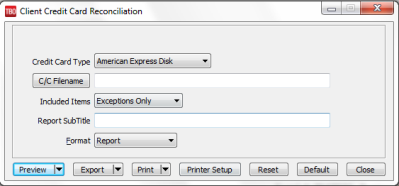
- From drop-down menu by Credit Card Type, select the credit card for which to run the exception report-- American Express Disk, American Express File, Diner’s Club 14-Digit, DL UATP, Visa, Diner’s Club 16-Digit, American Express KR-1022, Visa, or Mastercard.
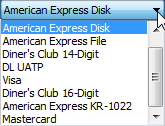
3. Enter the path to the credit card file--drive:\path\filename.prn or txt.
4. Under Included Items select All (to include all items), Exceptions Only (current default), or Valid Only.
5. Add a Report Subtitle to identify the report for a specific customer.
6. Select a Report or Mail Merge Format
7. Click Preview or Print to get an exception list of the differences between the data file from the credit card company and the Trams Back Office database.
Error Messages
|
Message: |
Means: |
|
Ticket Not Found |
Ticket is listed in the credit card data file but does not show in Trams Back Office. |
|
Different CC Number |
Credit card file and the Trams Back Office database are showing different CC card numbers. |
|
Different Form-Of-Payment |
Trams Back Office is showing a form of payment other than credit card. |
|
Different Ticket Amount |
The total fare in Trams Back Office and the amount in the credit card file differ. |
Group Revenue
This report produces an analysis of profits for a particular travel group, provided the invoices for the travel group have been tagged with a Invoice/Payment Group (created in Utilities|Setup|Groups). Columns of the report include: Invoice No, Name, Payment Date, Payment No, Revenue, Expenses and Current Group Profit.
1. Go to Reports|Payments|Group Revenue.
2. Select settings.
|
From/To Date |
Enter a date range for this report. |
|
Invoice/Payment Group |
From the drop-down menu, select the name of the group for which the report is being run. |
3. Click Preview to view the report to the screen. (Or click Print to send the report directly to the printer without viewing first.)
NOTE: Payments Made for Profile Type of “Other” with a Payment Group selected, show up on the Group Revenue Report. Group Expenses that are to be paid out of Group Revenue show as an “Expense” for the Group and reduce Group Profit accordingly.
Operating Payables
This report lists operating payables which can be selected in a variety of ways:
1. Go to Reports|Payments|Operating Payables.
2. Select settings.
|
Date Entered |
Enter a date range when these payables were created. |
|
Payable Status |
From the drop-down menu, select All, To be Paid, Paid and Recurring. |
|
Date Payable |
Enter a payable date range for this report. |
|
Payable Code |
Enter a payable code if applicable. |
|
Profile |
Enter a few letters of the profile name or click Profile to query for a particular client profile. |
|
Remarks |
First select an operator (Is Equal To, Is Not Equal To, Is Blank, Is Not Blank, Starting With, Contains, In, Not In) from the drop-down menu and match it up with specific criteria typed into field on the right. (When doing searches on fields containing “wildcard” search criteria using the selections of “IN” and “NOT IN," it’s looking for the field to contain the complete string entered between the delimiters or the exact match). If the remarks field contains the word ONE, and a search is done for IN ONE,TWO,THREE then there should be a result. If a search is completed for NOT IN ONE,TWO,THREE, then there should be no results. Basically using IN "ONE,TWO,THREE" is like doing: (IS EQUAL TO "ONE") OR (IS EQUAL TO "TWO") OR (IS EQUAL TO "THREE"). Using NOT IN "ONE,TWO,THREE" is like doing: (IS NOT EQUAL TO "ONE") AND (IS NOT EQUAL TO "TWO") AND (IS NOT EQUAL TO "THREE"). |
|
Payable Group |
From the drop-down menu, choose a payable group for which to run this report (set up in Utilities|Setup|Groups). |
|
Print Journal Entry |
Defaulted to checked. Unchecking the box does not print the JE's on the report, and can cut down the length of the report significantly. |
3. Click Preview to view the report to the screen. (Or click Print to send the report directly to the printer without viewing first.)
4. Click the print icon to print.
ACH Export
Create a file for handing off ACH payment data to a bank or other Payment Distribution Service. The file output conforms to the NACHA format.
1. Go to Reports|Payments|ACH Export.
2. Select settings to create a file.
|
From/To |
Enter a date range for export file. |
|
Bank Acct. |
From the drop-down menu, select the appropriate bank account. |
|
Payment Type |
By default, the Payment Type is hard-coded as Made. |
|
Format |
From the drop-down select report or file. |
|
Client Number |
Enter a the client number (this is the client account number issued by the bank. |
|
File Descriptor |
Type the file name format supplied by the bank. |
Audits
The credit card or name on check audit reports capture information when the full credit card number was viewed based on the user that was logged in at the time or displays the payee name on the check with old and new values.
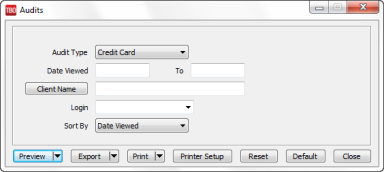
1. Go to Reports|Payments|Audits.
2. Select settings to run the report.
|
Audit Type |
Select Invoice or Check from the drop-down. |
|
Date Viewed From/To |
Enter a date range for the report. |
|
Client Name |
Enter the Client’s Name or leave blank for all. |
|
Login |
From the drop-down select the name of the login user or leave blank for all. |
|
Sort by |
Select the sort from Date Viewed, Client Name, Login, or Payment Number. |
General Ledger Reports
The following reports are listed under the Reports|General Ledger menu option:
|
Journal Entry Analysis |
Detailed history of Journal Entries. |
|
Account History |
Detailed history on specific G/L account with a running balance for each account item. |
|
Trial Balance |
General Ledger Trial Balance. |
|
Income Statement |
Defined period Income Statement. (Profit & Loss Sheet). For directions on how to print out this report, see General Ledger chapter. |
|
Balance Sheet |
Current financial position. To print out Multiple Balance Sheets by Branch Numbers, set this up in Utilities|Setup|Global Defaults|Prompt. A password is required to turn on this option. Moving from a Single Balance Sheet to Multiple Balance Sheets cannot be reversed easily. |
|
Chart of Accounts |
Listing of all General Ledger accounts and types. (See Chart of Accounts Report in General Ledger chapter.) |
|
GL Reconciliation |
Assists in reconciling an accounting period. |
Journal Entry Analysis Report
The Journal Entry Analysis report provides a detailed history of Journal Entries.
To print the Journal Entry Analysis Report:
1. Click Reports|General Ledger|Journal Entry Analysis.
2. Select settings.
|
From/To Date |
Enter a date range for this report. |
|
Journal Entry Number |
Enter a specific Journal Entry number of the entry for which to print the report. |
|
Type |
Use the drop-down menu to select: All, Standard, End-of-Period, Year-End, Reoccurring, or Budget. |
|
Status |
From drop-down menu, select All, Unposted or Posted. |
|
Format |
Select from a drop-down menu report for a printable version or mail merge to create a delimited file format of the report. |
3. Click Preview to view the report to the screen. (Or click Print to send the report directly to the printer without viewing first.)
Account History
The Account History report provides a detailed history of specific G/L account/s with a running balance for each account item.
To print the Account History:
1. Click Reports|General Ledger|Account History.
2. Select settings.
|
G/L Account |
Enter a specific G/L Account for this report (or find the account from the drop-down menu). Leave blank for all accounts. |
|
G/L Account Group |
After setting up an account grouping under General Ledger|Account Groups, select that group of accounts from drop-down menu. Details of each account in the grouping and a total for all the debits and credits in the grouping are displayed. |
|
From/To Date |
Enter a date range for this report. |
|
G/L Branch |
Use the drop-down menu to select specific branch numbers. |
|
G/L Branch Group |
Select a branch group if set up from the drop-down. |
|
JE Group |
Select a JE group if set up from the drop-down. |
|
Format |
From drop-down menu, select Summary or Detail. |
|
Summary Remarks |
From the drop-down menu, select a qualifier, Is Equal to, Is Not Equal to, Is Blank, Is Not Blank, Starting With, Contains, In, Not In, and enter matching criteria (can be wildcard) to pull up JE’s which meet said criteria. (Data is pulled from Journal Entry Remarks.) |
|
Detail Remarks |
From the drop-down menu, select a qualifier, Is Equal to, Is Not Equal to, Is Blank, Is Not Blank, Starting With, Contains, In, Not In, and enter matching criteria (can be wildcard) to pull up JE’s which meet said criteria. (Data is pulled from Journal Entry Remarks.) |
|
Output Format |
Select Report or Mailmerge from the drop-down. |
|
Pseudo Post |
Check here if the report is Pseudo Post (the End of Period and posting have not been done). |
|
Active Accts Only |
Check here for active accounts only. |
|
Running Balance |
Check here to run a balance for each account item. |
3. Click Preview to view the report to the screen. (Or click Print to send the report directly to the printer without viewing first.)
Trial Balance
The Trial Balance shows the totals debit balances and total credit balances in the General Ledger to confirm that the total debits equal the total credits. This report used as part of the Monthly Routine to verify that Core Report totals shown in the G/L actually match Core Report totals (see Suggested General Ledger Procedures in the chapter entitled, Setting Up Trams Back Office.)
To print the Trial Balance report:
1. Go to Reports|General Ledger|Trial Balance.
2. Select settings.
|
As Of |
Enter an As Of date for this report. |
|
G/L Branch |
Use the drop-down menu to select a specific G/L branch number. |
|
G/L Branch Group |
From the drop-down select a G/L branch group if one has been set up. |
|
Output Format |
Select from a drop-down menu report for a printable version or mail merge to create a delimited file format of the report. |
|
Include Zero Accts |
To include zero accounts, check here. |
|
Print Balance |
To include balances on report, check here. |
|
Pseudo Post |
To print report in Pseudo Post (the End of Period and posting have not been done), check here. |
3. Click Preview to view the report to the screen. (Or click Print to send the report directly to the printer without viewing first.)
Income Statement
The Income Statement displays the profit or loss of all business activities during a specific period of time. Before an accurate Income Statement can be printed, the End of Period journal entry must be created first. (See Maintaining the General Ledger in the General Ledger chapter.) An Income Statement shows balances for Sales, Cost of Sales and Expense accounts (4000, 5000, 6000, 7000, 8000, 9000 series General Ledger accounts.) To print the Income Statement or Profit and Loss Sheet (Sales minus Cost of Sales minus Expenses equals the Profit for the period):
1. Click Reports|General Ledger|Income Statement.
2. Select settings.
|
Column 1 From/To Dates |
Enter a date range for this report. |
|
G/L Branch |
Use the drop-down menu to select a specific branch number or leave default for all. |
|
G/L Branch Group |
If a specific branch groups were set up, select the one for which to run an income statement from the drop-down menu. |
|
Type |
From drop-down menu, select Actual or Budget. Actual shows the income based on standard journal entries for the period. Budget is based on Budget journal entries. |
|
Columns 2, From/To Dates |
Enter a date range of other columns if running a comparison report. |
|
Column 3/4 From/To Dates |
A total of 4 columns are available for printed reports in addition to mailmege. The report automatically suppresses the printing of ALL percentage columns when a 3rd or 4th date range field is selected and the report automatically prints in landscape like it now does when portrait won't fit all the columns. Suppressing the percentage columns only when selecting a 3rd or 4th date range allows the report to show the percentage columns for those agencies wanting and needing to see that data as is currently shown. When the report is run for 3 columns of data, a 4th blank column also is displayed by design. |
|
Pseudo Post |
Use drop-down menu to select Yes or No (the End of Period and posting have not been done). |
|
Format |
From drop-down menu, select Summary, Detail, Summary by Revenue, Detail by Revenue, or Mail Merge. Summary shows each summary general ledger accounts with a balance, as well as detail accounts that do not have a summary account. Detail shows each individual general ledger account with a balance. Summaryby Revenue shows each summary general ledger accounts with a balance, as well as detail accounts that do not have a summary account and also total revenue per Travel Type. Detail by Revenue shows each individual general ledger account with a balance and also total revenue per Travel Type. Mail Merge gives the ability to output the report to other programs. (Excel for example using comma delimiter.) |
| Include percent columns for each date range specified | Select/Deselect to display or hide the % column. This prevents data truncation when using all 4 date options. |
3. Click Preview to view the report to the screen. (Or click Print to send the report directly to the printer without viewing first.)
Balance Sheet
To get an accurate Balance Sheet, an End of Period journal entry must be done. (See Maintaining the General Ledger in the General Ledger chapter.) A Balance Sheet describes the financial condition of a business at a precise point in time. The Balance Sheet shows balances for Assets, Liabilities and Capital accounts in the 1000, 2000, and 3000 series General Ledger accounts (Assets minus Liabilities equal Capital plus Profit for the period):
1. Click Reports|General Ledger|Balance Sheet.
2. Select settings.
|
As Of Date |
Enter as of date for this report. |
|
Pseudo Post |
Check here if this is Pseudo Post report (the End of Period and posting have not been done). |
|
Format |
From drop-down menu, select Summary or Detail. A Summary shows Summary general ledger accounts and Detail general ledger accounts that don't refer to a summary account. A Detail prints every general ledger account with a balance. Mail Merge gives the ability to output the report to other programs. |
|
G/L Branch |
If using the Multiple Balance Sheet option, in the Branch field, click the arrow to choose a branch. |
|
G/L Branch Group |
From the drop-down, select a G/L branch group if one has been set up. |
3. Click Preview to view the report to the screen. (Or click Print to send the report directly to the printer without viewing first.)
Chart of Accounts
To get a listing of all General Ledger accounts:
1. Go to Reports|General Ledger|Chart of Accounts.
2. Select settings.
|
Only Include Active G/L Accounts |
Check here to include only active General Ledger accounts. |
3. Click Preview to view the report to the screen. (Or click Print to send the report directly to the printer without viewing first.)
GL Reconciliation
The GL Reconciliation report is used to aid in reconciling financial reports at the end of the month. It flags items that could possibly cause financial to be out of balance when compared against the Core Reports.
1. Go to Reports|General Ledger|GL Reconciliation.
2. Select settings.
|
From/To Dates |
Enter date range for report. |
3. Click Preview to view the report to the screen.
4. Click the print icon to print. The report displays a list of items that may need correcting. Query each item and correct it if needed.
NOTE: Notice a flag on the GL Reconciliation report per bank account when the monthly totals of receipts and deposits don’t match.
Possible GL Reconciliation Error Messages
|
Message |
Description |
|
Invoice: Client Payment is Missing |
An invoice (listed by Invoice RECORD number) shows the client payment as Closed. |
|
Invoice: Vendor Payment is Missing |
An invoice (listed by Invoice RECORD number) shows the vendor payment status as Closed. |
|
Payable is not Journalized and Should Be |
A Payable exists without a Journal Entry. |
|
Payment Is Journalized And Shouldn’t Be |
Only Payments Received and Made where the Profile Type is Other or where the Payment Method is Other, or Bank Withdrawals should be journalized. |
|
Payment Is Not Journalized And Should Be |
Payments Received and Made where the Profile Type is Other, or where the Payment Method is Other, or Bank Withdrawals must have a journal entry. |
|
Payment Amount Doesn’t Match Journal Entry Amount |
The amount of the payment does not match the amount posted to the Cash in Bank account in the journal entry. This message also appears if the amount is being posted to the incorrect Cash in Bank account or the debits and credits have been reversed. |
|
Payment Date Doesn’t Match Journal Entry Date |
The date on the payment screen should always match the date in the journal entry screen. |
|
Pymt Invalid For JE That Affects Client Balances*** |
A journal entry should only affect Client Balances when a Payment Received or Made is entered that has a payment method of Other and a profile type of Client. |
|
Pymt Invalid For JE That Affects ARC/BSP*** |
A journal entry should only affect ARC/BSP when a Payment Received or Made is entered that has a payment method of EFT and a profile type of Vendor-ARC/BSP. |
|
Pymt Invalid For JE That Affects Vendor Balances*** |
A journal entry should only affect Vendor Balances when a Payment Received or Made is entered that has a payment method of Other and a profile type of Vendor-Supplier. |
|
Pymt Invalid For JE That Affects Cash In Bank*** |
A journal entry should only affect Cash in Bank when a Payment Received or Made is entered that has a payment method of cash, check or EFT and a profile type of Client, Vendor or Other. Also for Bank Withdrawals. |
|
Credit Card Pymt Date Doesn’t Match Invoice Date |
A client payment with a payment method of Credit Card should have the same date of the invoice. |
|
Bank Account #1 Difference Between Receipts And Deposits: 500.00 |
There should always be a receipts report to match every deposit. The message means there is a discrepancy and the deposit entered needs to be re-reconciled. |
|
Payment Out of Balance |
Summary and detail amounts of the payments do not match. This entry should be voided and reentered. It may cause an out of balance between debits and credits in the End of Period which would prohibit completion of the month-end process. Could be due to invalid foreign currency converisons. |
*** When a Posted End of Period is voided, the entry is converted back into a normal journal entry and a reversing journal entry is also created. This results in these messages seen here. If these messages are received as the result of a voided End of Period, ignore the message.
*** If a Pseudo End of Period is in the system, see “Payment Invalid for JE” messages for Client Balances, ARC Balances, Vendor Balances and Cash in Bank.” These messages are just warning that one or more Pseudo EOP's are in place. These messages can be ignored, since there are prompts to void all Pseudo EOP's before performing a Full EOP or when Pseudo EOP's exist prior to Posting.
Interface Reports
|
The following reports are listed under the Reports|Interface menu option: |
|
|
Invoice List |
Lists downloaded invoices waiting to be processed. Note: TBO shows the foreign currency value and currency code for comm track transactions on the Interface Invoice List report. |
|
Record List |
All the information behind each Rec Loc Button for every invoice where the information has not been purged under Utilities|Purge|PNR History. Hint: Before printing out this report, save this res.txt file somewhere on the hard drive by clicking Save As FIRST. Regenerate the interface files using this file if there are any problems. Call support for help with this. |
|
Downloading/Processing Error Log |
Log of errors found during Download or Processing. These logs are automatically purged in conjunction with the PNR history purge routine (Utilities|Purge|PNR History. |
For complete instructions on how to use these reports, please refer to the Interface Download and Processing section of this manual.
Profile
Trams Back Office provides the ability to create lists and labels from the database. Customize the mailing list for target marketing opportunities by filtering the results through the selection criteria fields. The more fields completed, the narrower the results.
To the right of each selection field is a separate field with selection options or operators: Is Equal To, Is Not Equal To, Is Blank, Is Not Blank, Starting With, Contains, In, and Not In. These operators help to more narrowly define the search. (When doing searches on fields containing “wildcard” search criteria using the selections of “IN” and “NOT IN," the system looks for the field to contain the complete string entered between the delimiters or the exact match). If the remarks field contains the word ONE, and a search is performed for IN ONE,TWO,THREE then there will be a result. If a search is completed for NOT IN ONE,TWO,THREE then there be no results. Basically using IN "ONE,TWO,THREE" is like doing: (IS EQUAL TO "ONE") OR (IS EQUAL TO "TWO") OR (IS EQUAL TO "THREE"). Using NOT IN "ONE,TWO,THREE" is like doing: (IS NOT EQUAL TO "ONE") AND (IS NOT EQUAL TO "TWO") AND (IS NOT EQUAL TO "THREE").
For example, if entering “golf” into the Travel Preference field, the query searches for all profiles in the database that have a travel preference of golf. If, however, the search is further limited by entering 90045 in the zip code field, the search is now limited to those with a travel preference of golf within the 90045 zip code area.
In addition to creating labels and mailing lists, running a weekly list of profiles provides an opportunity to eliminate duplicates and update information. Maintaining a clean database gets date sensitive travel opportunities to the right customers on time.
Note: ClientBase prints out mailing lists and handles duplicate profiles at a much higher level of proficiency. Use the Profile Dupe Checker to merge invoices and payments from one profile to another and automatically delete out profiles no longer wanted.
1. Click Reports|Profile.
2. Select settings.
|
Name |
Enter the name or portion of name depending on the operator selected. |
|
Profile Type |
Select one or more of the following: Leisure, Corporate, Vendor, Agent, Other or All. |
|
City |
Enter the city or portion of the city depending on the operator selected. |
|
Report Type |
Select Report, Label or Mail Merge (for ASCII export format). |
|
State |
Enter the state or portion of the state depending on the operator selected. |
|
Sort By |
Select Name, Zip & Name or Interface ID. |
|
Zip |
Enter the zip code or portion of the zip code depending on the operator selected. |
|
Format |
Select Summary or Detail as applicable. |
|
Phone |
Enter the phone number or portion of the phone number depending on the operator selected. |
|
Print Passengers |
From drop-down menu, choose No, Yes, Not Alphabetized, or Yes, Alphabetized to print passengers. If set to yes, must have names listed in the profile under the Employee|Family tab. |
|
Group/Batch |
Enter the group/batch name or portion of name depending on the operator selected. |
|
Print Labels in Caps |
As requested by the United States Post Office, there is an option to print labels in all capital letters. All capital letters on labels complies with USPS requests. |
|
Travel Pref |
Enter the travel preference or portion of the travel preference depending on the operator selected. |
|
Use Cross Reference |
If a ross reference is generated when printing out Vendor Activity Reports or some Report Generator reports, check Use Cross Reference. The labels printed are the names selected when the report was set up. |
|
Business Affil/Type |
Enter the business affiliation/type or a portion of it depending on the operator selected. |
|
Show Inactive Profiles |
Click here to print out Inactive Profiles. |
|
Other |
Enter the Other entry or portion of Other entry depending on the operator selected. |
|
Notes |
Enter the note or portion of note depending on the operator selected. |
|
Add’l Notes |
Enter the note or portion of note depending on the operator selected. |
|
Interface ID |
Enter the Interface ID or portion of Interface ID depending on the operator selected. |
|
Date Created From/To |
Double-click in field to double-click on date on calendar, or enter the date in this format, MM/DD/YY. |
|
Client Invoices/From/To |
From the drop-down, select All, With, or Without, and the appropriate date range. |
3. Click Preview to view the report to the screen. (Or click Print to send the report directly to the printer without viewing first.) To print a full page of labels check Print full Page of Labels for Each Address.
|
Your profiles in Trams Back Office are entered in upper and lower case for easy readability. However, since you are doing a big mailing this month, you choose to print labels in all capital letters assisting your local post office and their electronic reading machines. Go to Reports|Profiles, which takes you to Lists and Labels. Change the Report Type to Labels. After completing the appropriate selection criteria, and you’re ready to print your labels, you are presented with a Label Setup box. |
If a slash or comma exists in the passenger name field in the profile, Trams Back Office takes everything before the slash or comma and prints it as the last name, and everything after the slash or commas is printed as the first name.
Use Cross Reference to Generate Labels
The agency is preparing a master letter to everyone who has taken a cruise within this past year, notifying them of the agency's discount plan for repeat cruisers. First find out who the clients are who have taken a cruise this past year.
1) Go to Reports|Report Generator|Print Reports and select a Client Activity Report (such as CL_AS.rpt).
2) Enter the selection criteria for Submit To "Supplier/Comm Track", with a Travel Type of "Ship Final" and run the report for the last year to find all the clients who have taken cruises.
3) Select "Client Only" or "Client & Vendor" under the Cross Reference field on the Advanced Tab.
4) Preview the report. No need to print it.
5) To print labels or to merge the names from this "Ship Final" query in Report Generator from Trams Back Office to a word processor, go to Reports|Client|Lists & Labels, or Reports|Profile.
6) Select "Label" in the Report Type field, if to print labels, or "Mail Merge" to export a file to a word processor.
7) Check Use Cross Reference Data.
8) Make sure the Zip Field IS NOT BLANK, so that any client name without an address/zip code are not printed.
9) Click Preview and select the label type. Print labels.
For Mail merge, click Print and map to the directory and folder in the Save To field (usually C:\Programs\Tramswin\Reports). Enter the name of the file (repeat cruisers.txt in the File name field and save as a .txt file, and Click Save. Merge all selected client names and addresses into the master letter by accessing this saved file through a word processing software using its instructions.
Mail Merge
Mail Merge is an option that takes the information stored in Reports and puts it into a format accepted by other software applications. To activate this option when printing lists, select the desired selection criteria, and click on the down-arrow on the Report Type field to select the option for Mail Merge. Click O.K. to process the report. Next, decide where to save the file and enter the full path, including the directory and a file name (with the extension) in the File Name field. The file has a .txt extension. Click on Save.
The mail merge file is a tab-delimited file. Change this delimiter in the Utilities menu, under Setup, then Global Defaults.
Report Generator Reports
Please see chapters referenced below for complete overview of Report Generator Reports:
|
Print Report |
See chapter entitled, Report Generator Reports. |
|
Build Report |
See chapter entitled, Building Reports with the Report Generator Overview. |
Financial Modeling
|
Financial Modeling Sections |
|
|
Analysis
For complete instructions on setting up Financial Modeling, see Chapter entitled, Financial Modeling, |
This report has 3 sections: Revenue Analysis includes Total Sales, Cost of Sales, Number of Bookings, Percent of Gross Sales, Average Commission Percentage, Commission per Booking, Percentage of Total Expenses, and Percentage of Fixed Expenses by Travel Type. It also shows the Total number of invoices, the Average Gross Sales per invoice, and average commission per invoice. The Expense Analysis section gives an expense break down by Expense Category. It shows what each category is as a percent of total expenses. Find out fixed versus variable spending, and average expense per invoice. Management Analysis compares Sales, Revenue, and Expense Totals, along with Total Invoices, Bookings and Segments per Employee, per Sales Agent, per CRT, and per square foot.
|
Export - Prism Handoff File
The Prism Hand-off file is a data export program designed and used by agency and agency corporate clients who are working with British Airways and other various airlines. Find this under Reports|Export|Prism Hand-off. Fill in the selection criteria and click OK. A series of 8 export files with the extension .inp are created in a specified directory specify. Include or exclude a UDID from the report, and Service Fee Bookings. Notice the Don’t Include Commission Amounts checkbox when if checked, the commission amount fields in the exported files show as $.0.00. So if the party receiving the exported files does not require commission information, there is a way to prevent that information from being shipped.
Export - Maritz Handoff File
The Maritz Hand-off file is a data export program designed and used by agency and agency corporate clients who are working with Maritz. Find this under Reports|Export|Maritz Hand-off. Fill in the selection criteria and click OK.
Export - CWT Handoff File
The CWT Hand-off file is a data export program designed and used by agency and agency corporate clients who are working with CWT. Find this under Reports|Export|CWT Hand-off. Fill in the selection criteria and click OK.
Batch Reporting
Since batched reports can be saved and retrieved for frequent processing, the date fields in all reports also allow for date formulas. This means any report field that has a date, can also contain a formula for that date. The date formula function submits a report for batch processing without identifying a specific month, day and year in the From and To date fields. Instead, the report is submitted with a formula for the month, day, day of the week, and year based upon the date the report is processed.
Remember: Batch reports are all date sensitive. Make sure the system date and time are correct.
Batch reports adhere to User Permission settings. If a user does not have permission to preview or print a specific report, they are prompted as such. The report can be temporarily deleted from the batch so that other reports that the user does have permission to run can be generated.
Benefit: When entering a date formula, the system converts it to the intended time period and allows for batching reports and saving the batch for future use without the need to modify dates.
Example: The following tables contain sample formulas for specifying dates. Mix and match the absolute and relative parameters in the function. The first number specifies the day of the month, the second number specifies the month, and the third number specifies the year. So if the first number filled in, this means this report is wanted to reoccur on this day every month, in every year.
Batch Reporting Date Formulas
|
Example Scenarios |
Enter This |
|
On the 31st of each month here is how to provide a batch of corporate clients with various Summaries and Fare Savings reports for that month. |
From: =1,0,0 To: =31,0,0 |
|
At any point an Income Statement can be run, a Sales Activity summary and a Financial Modeling Analysis report for year-to-date. |
From: =1,1,0 To: =0,0,0 |
|
On the 15th of each month here is how to generate statements for all clients that have a pending balance from the beginning of time to the 31st of the previous month. |
From: =1,1,0 To: =31,-1,0 |
|
Throughout the month to see a check register for each bank account from the beginning of the month to the current date. |
From: =1,0,0 To: =0,0,0 |
|
Daily Reports |
|
|
Client Balances |
=0,0,0 |
|
Vendor Balances |
=0,0,0 |
|
ARC Reconciliation |
=0,0,0 |
|
Check Register |
=1,0,0 to =0,0,0 |
|
Invoice/Analysis |
=0,0,0 |
|
Payments/Received |
=0,0,0 |
|
Weekly Reports (these are set for printing on a Monday) |
||
|
ARC Reconciliation |
=-7 to -1 |
=Mon-1 to =Sun |
|
Invoice/ARC |
=-7 to -1 |
=Mon-1 to =Sun |
|
Invoice Analysis |
=-7 to -1 |
=Mon-1 to =Sun |
|
Invoice/Activity |
=-7 to -1 |
=Mon-1 to =Sun |
|
Sales Agent Activity |
=-7 to -1 |
=Mon-1 to =Sun |
|
Monthly Reports |
|
|
Balance Sheet (as of last day of last month) |
=31,-1,0 |
|
Income Statement – Month |
=1,-1,0 to =31,-1,0 |
|
Income Statement –Year-to-Date (year to end of last month) |
=1,1,0 to =31,-1,0 |
|
Account History (for last month) |
=1,-1,0 to =31,-1,0 |
|
Client Balance (as of last day of last month) |
=31,-1,0 |
|
Vendor Balances (as of last day of last month) |
=31,-1,0 |
|
Check Register (for last month) |
=1,-1,0 to =31,-1,0 |
Batch Reports Load and Save Option
To load or save a group or batch of reports, select the Reports|Batch Reports menu. This displays a Batch Report Window. Leave this window open.
To prepare a report for batch printing and processing later, select the Reports menu and then select a report to include in the batch. Type in the parameters and enter the date formulas and then click the Batch button. Repeat for each report included in the batch. Next, go back into the Batch Report Window and save these reports with a specific name by clicking the Batch Name field and typing in a Batch Name. Then click the Description field and type a description of the batch and click the Save button.
Note: Did you know you could e-mail a batch report as a .pdf file type? Only one report or batch of reports can be e-mailed at a time from this screen by clicking E-mail.
To print a batch of reports, select the Reports|Batch Reports menu. Click Load. Trams Back Office displays a second window with the list of report batches. Highlight the batch or batches to print and click Print. To move a report to a different print position, click on the report and use the Move Up and Move Down buttons to re-position the report in the listing. To email a batch of reports in .pdf format, click E-mail to be launched into an email screen with the batch reports listed as attachments.
To delete a report or batch of reports, click Reports|Batch Reports and Load. Highlight the report to delete and click Delete. If it is a batch to delete, highlight the batch name and click Delete.
Viewing Batch Reports
When on the Batch Report screen, clicking the Preview button previews reports in Mail Merge format as well as those in report format. There is no requirement to save each Mail Merge report separately. From that preview, it is possible to save multiple reports to a folder, again without saving each report separately. When multiple reports are selected, clicking Save will prompt for a folder location to save the selected reports. Select an existing folder or create a new folder. Any reports in Mail Merge format will be saved as text; any reports in Report format will be saved as PDF. The files will be saved using the Report Description (as seen on the Batch Report screen) for the file name. If a file with the same name already exists in the folder, the new report will be saved with a number at the end of its name so as not to overwrite the existing report.
From the Batch Report Preview, e-mailing multiple reports works the same way -- multiple reports using both Mail Merge and Report format can be selected simultaneously and attached to an e-mail message.
When printing multiple reports from the Batch Report Preview, only reports in Report format will be printed. Mail Merge reports will be skipped.
Print a Batch Report Using the Windows Task Schedule
The following are the steps for a doing a scheduled printing for batch/s in Trams Back Office:
1. Schedule the batch printing or emailing by clicking on Start|Programs|Accessories|System Tools|Schedule Task. Click Add Schedule Task.
2. Follow the Wizard by clicking Next, and then Browse. Map to the TBO icon on the desktop, or to the Program Files|Trams|Tramswin|Tramswin.exe.
3. Next select how often to run the backup by selecting the following Start Time, When task is performed and Start Day.
4. Enter the login for the computer (use the password entered when logging into the PC or to the network in the office, and make sure the password is correct and leave blank if there is no password). Be sure to check in the box next to Open Advanced Properties for this task and click Finish. A Task Tab window opens for Trams Back Office.
5. Ensure the correct information is entered (see below) in both the RUN: and START IN: fields.
Multiple Batches are separated by a comma. There is a space before all the dashes and between username and the value, password and the value etc.
To PRINT A BATCH report to the default printer via the command line:
RUN: field add - TramsWIN.EXE -username sysdba -password ******** -alias Trams -printbatch
SAMPLE:
RUN: "C:\Program Files\Trams\Tramswin\Tramswin.exe" -username sysdba -password ****** -alias Trams -printbatch 4,5
START IN : "C:\Program Files\Trams\Tramswin\Tramswin.exe"
Where the batch numbers are 4 and 5 (Use the Batch Number from the Batch Report Screen in TBO).
6. Make sure the computer is on when the process is scheduled.
Scheduled E-mailing
1. Follow the steps in Scheduled Reporting above.
2. Command line entry format in Schedule Task should follow the example in step 3 below (insert the proper variables to reflect your real information)
3. C:\PROGRA~1\Trams\Tramswin\Tramswin.exe -username SYSDBA -password your password here -alias demodata -emailbatch 1 linda@sabre.com
TCR Viewer
Trams Crystal Reports (TCR) give the agency the ability to run predesigned Crystal Reports as an alternative to those offered within the Trams Back Office product. It is a free add-on Trams Back Office. To download a Crystal Report Viewer and view and download reports to use in the agency, go to http://static.trams.com/tramslibrary/reports/tbotcr.html
Once the viewer has been installed and reports have been downloaded, run the reports from inside TBO by going to Reports|TCR Viewer.
ODBC DSN: By default the database is defaulted to the Trams database. (But choose from the drop-down, dBase Files, Excel Files, or MS Access Database.)
User Name/Password: Enter the User Name (default is SYSDBA), and Password for the Trams database.
Report Name/Browser: Select the report to run by browsing to it on the computer. (These reports were downloaded by the agency.)
View Report: By clicking View Report, the user is launched into a screen to setup the parameters (dates, etc.) with which to run report.
Login Attempts Audit Report
Provides a listing of login attempts, login lockouts, invalid account access, and password recoveries.
1. Go to Reports|Audit|Login Audit.
2. Select settings.
3. Click Query to view the report.