
General Ledger
This chapter contains the following sections:
- Maintaining a GL in Trams Back Office
- General Ledger Query Feature
- Journalized by Transaction vs. Through End of Period
- End of Period Journal Entry (Full and Pseudo)
- Journal Entry
- Budget Entry
- Year End
- Voiding End of Period and Year End
- Accounts
- Generate Budget
- G/L Account Reconciliation
Maintaining a General Ledger in Trams Back Office
The Trams Back Office system includes a fully integrated General Ledger. Because the General Ledger is a direct by-product of the Four Core Reports, its successful implementation in Trams Back Office is key. This chapter outlines using the General Ledger in Trams Back Office.
The General Ledger is active the day the first invoice or payment is entered in Trams Back Office. The system makes it easy by automatically recording all the journal entries associated with every invoice, refund, client payment made or received, vendor payments made or received, and ARC/BSP settlement payments. Trams Back Office sends these journal entries to the general ledger with one routine called “End of Period.” Learn more about the End of Period journal entries in this chapter. The only journal entries not included in the End of Period routine are those associated with bank withdrawals, and payments received or made using a Profile Type or Pay Method of “Other.” These types of transactions require journal entries transaction by transaction.
What follows is a basic overview on integrating the invoice and payment entries into the General Ledger. These procedures are only recommendations, and are designed to be simple and basic. An accountant is still recommended for review, adjustments, taxes and year-end closings. Any variations (and the level of detail) are entirely up to each agency and the user’s level of experience with accounting. It’s a good idea to confirm decisions with the agency’s accountant.
Query - Retrieving an Existing JE
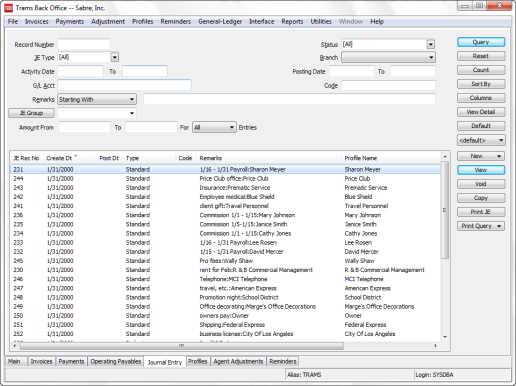
Using Query, retrieve a previously entered journal entry. The fields displayed above identify the criteria by which a journal entry can be located. Use each of these fields captured within a journal entry to locate a journal entry. The more criteria entered in Query, the more selective the search for matching journal entries becomes. Enter the criteria available or applicable and the system provides a complete listing of journal entries matching that criteria.
For example, if the only criteria entered into the Query screen is the Journal Entry Type of End of Period, a listing of all End of Period journal entries ever created is displayed in the order they were created by JE number for selecting. If, in addition to the Journal Entry Type, an Activity Date is completed, then the list is narrowed and only includes End of Period journal entries created within that time frame.
NOTES:
Activity Date and Posting Date automatically default the To field to whatever is entered into the From field. This allows for quick retrieval by Date, or enter ranges.
To query by a debit or credit amount range, enter a range in the Amount from and to.
To the right of the Remarks field is a separate field with selection options or operators: Is Equal To, Is Not Equal To, Is Blank, Is Not Blank, Starting With, Contains, In, and Not In. These operators help to more narrowly define the search. (When doing searches on fields containing “wildcard” search criteria using the selections of “IN” and “NOT IN," it is desired for the field to contain the complete string entered between the delimiters or the exact match). In other words, In and Not In works like Is Equal to or Is Not Equal to except that the list of values when using In and Not In when separated by a comma will search for each value in the list. The entire text would need to match exactly for Is Equal to or Is Not Equal to.
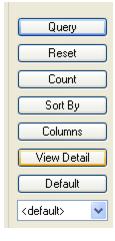
Buttons on the right side of the screen are also broken into two sections. Query, Reset, Count, Sort by, Columns, View Detail and Default are
Reset clears away any previous query criteria in the General and Advanced tab.
Count gives the number of items that match the query criteria.
Columns is used to select which columns of data to display in the results screen. Click Columns and choose the columns displayed by highlighting the column in the Available Fields and clicking the left arrow to move it over to Displayed Fields. Using the red up and down arrows, put the column in the order wanted to appear on the results screen. Click Save Settings and OK. Go to the results screen and size the columns. Go back into Columns, click Save Settings and OK to save (make sure to select sorts before saving).
Drag and drop the columns to re-position them on the results screen if desired. Do this by clicking on the column to move, holding down the left mouse button, and sliding the column to any position on the query screen. To place a column to the right or left of any existing column, stop on the column to the right or left and release the mouse. The moved column is inserted in the correct place. Go into Columns, click Save Settings and OK to save.
View Detail is similar to how the button works in the invoice query screen, when View Detail is selected, the details of each journal entry screen are now displayed in the query results grid. The query results default to the traditional summary view, when the view detail button is clicked the results changes to list each item in journal entry separately.
Default is where to save queries and filters in the query following these directions:
1. Change the selection criteria on the results screen for the new query to save.
2. Click Default.
3. Type in the new query name in the Setting Name field.
4. If this saved query is the default, at the top of the drop-down window, check Set As Default.
5. Select Per User (on this one workstation only) or Global (on everyone’s sets).
6. Click OK to save.
To remove a saved query from the list, check the Remove the Current Named Setting box, click OK and the saved query is no longer available for use in the drop down field.
Once the listing of matching journal entries is displayed through Query, any journal entry can be added (New), viewed (View), copied (Copy), printed (Print JE) or (Print Query) or voided (Void).
Selecting Queried Journal Entries
To select a Journal Entry to view or modify, once the listing of matching journal entries is displayed on the screen, either double click the item or highlight the appropriate journal entry and click View. Note: If the journal entry was created from within a payment entry, Trams Back Office suggests retrieving the payment to view the journal entry.
Tip: Use Ctrl-PgDn/Ctrl-PgUp to access next or previous payment.
Updating One or Multiple J/E’s Remarks Simultaneously
By clicking View, edit a Journal Entry remark and click Update. Multiple remarks can be updated simultaneously (provided the same remark applies to multiple journal entry line items. Select multiple lines in the J/E screen at once by using Control/Click or Shift/Click. When multiple lines are selected, all of the fields at the top of the screen except Remarks and Detail Group are disabled. After entering a remark and/or a detail group, pressing update will update all of the selected line items. When only one line is selected, the screen works as it does now, and the global modify button is disabled.
Copying Queried Journal Entries
To copy information from an existing journal entry as defaults into a new journal entry, highlight the appropriate journal entry to be copied, and click Copy. The system displays a new journal entry record with all defaults completed from the copied journal entry.
Tip: The date does not default to the copied journal entry's date but instead defaults to the system date. Add, change or delete any of the journal entry lines by highlighting the line, making the change, and electing Add, Update, or Delete. This shortcut may come in handy for quickly entering recurring journal entries, such as depreciation tables and budgets. If combined with the ability to Query by Journal Entry code, recurring journal entries are quickly captured into Trams Back Office.
Print Journal Entry
To void and reenter a Journal Entry, use the Print JE button to take a snap shot of the entry to use as a reference for data entry.
1. Query the Journal Entry.
2. Click the Journal Entry to highlight the selection.
3. Click Print JE.
Print Query
Use Print Query to print out the isolated list created in the Journal Entry query screen. Select what Journal Entries are to be printed by using SHIFT and CTRL.
Right-Mouse Click Menu in Journal Entry Query
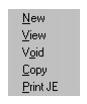
New - create a new journal entry.
View the journal entry.
Void the journal entry.
Copy the journal entry.
Print JE - prints the journal entry.
Sorting Journal Entry Data
Sort data in all query screens in two ways:
1. “Quick” sort by one field by clicking on a column in the results screen. The first time click sorts the column in ascending order (first to last or earlier date to more current date), and clicking on the same column a second time sorts in descending order (last to first or current date to earlier date).
2. Sort in Ascending or Descending order by up to 3 columns. When clicking Sort By, select the first, second or third column sort and what order (ascending or descending) the data is to be displayed. Enter the selection criteria and click Save Settings and OK.
Voiding a JE- If Record Number is Known
1. Click General Ledger|Query.
2. Type in the record number of the journal entry being voided. Click Query to process.
3. Click and highlight the journal entry and click Void.
4. Trams Back Office prompts, Void This Journal Entry? Click YES.
Void if the JE’s Record Number is Not Known
1. Click General Ledger|Query.
2. Query by any one (or more) of the fields shown. (It is best not to fill in all of the fields. Usually two or three are sufficient.)
3. In the Journal Entry Type field, click the arrow to see a list of types of journal entries to void. Choices are Normal, End-of-Period, Year-End, Recurring,Budget, or choose All.
4. In the Status field, change the status to read Unposted.
5. In the Activity Date field, enter the date or a date range in From and To, that the journal was dated.
6. Click Query to process.
7. Trams Back Office displays all matches. Click the correct journal entry, highlight it, and then click Void.
Note: End of Period and Year End entries cannot be voided from this screen. See “Void End of Period and Year End Entries” section of this chapter.
8. Trams Back Office prompts, Void This Journal Entry? Click YES.
Note: When a journal entry is voided in Trams Back Office, no history of that journal entry is maintained. The journal entry record is erased from the system. If the journal entry was created from within a payment, also void the payment. Trams Back Office suggests in this situation to void the payment and the system automatically voids the journal entry.
Journalized by Transaction vs. Journalized Through the End of Period
Invoices
One purpose for entering invoices into Trams Back Office is to maintain sales figures which are reflected in a report called the Invoice Activity Report. Sales and Cost of Sales (or Gross and Net) are reflected on the Invoice Activity Report and are printed for any specified period. Another reason for entering Invoices into Trams Back Office is to create the Client, Vendor and ARC/BSP Balances passed through the agency as a result of these Sales and Cost of Sales. The Client Balances are created from the Total Fare or Sales figure and the vendor and/or ARC/BSP Balances are created from the Net Fare or Cost of Sale.
Instead of updating Sales, Cost of Sales, Client, Vendor and ARC/BSP Balance accounts within the General Ledger each time an invoice is entered, Trams Back Office updates these accounts once through the “End of Period” journal entry. Therefore, during the period, invoices can be entered, modified, and voided with no effect on the General Ledger until the End of Period journal entry is created.
In the world of accounting, there are always at least two GL Accounts to every journal entry. In the case of Invoices, the Total Fare updates the Sales accounts and Accounts Receivable (Client Balances) and the Net Fare updates the Cost of Sales accounts and the Accounts Payable (Vendor and/or ARC/BSP Balances). In the case of payments affecting the bank account, one side updates the bank balance and the other side is a General Ledger account which indicates the description of the payment itself (what it was for).
Payments
In Trams Back Office, there are five types of payments received and made. Selecting the Profile Type when entering a payment determines which reports will be affected.
|
Profile Type |
Report Affected |
|
Client |
Core/Client Balances |
|
Vendor |
Core/Vendor Balances |
|
Agent |
Prompts user to enter a Journal Entry |
|
Other |
Prompts user to enter a Journal Entry |
Each of these payments also update the bank balance.
All Invoices and any payments attached to invoices update the General Ledger when an End of Period posting is performed (General Ledger|End of Period). Trams Back Office recommends creating an End of Period for each month or each accounting period, if using 13-period accounting.
Any payments entered with a Profile Type of Other or Pay Method of Other triggers a prompt to complete the journal entry (journalized by transaction). The payment type of Withdrawal is also journalized by transaction. Journal Prompting Options can be found under the Utilities|Setup|Global Defaults/Prompt tab. The prompting option choices are: Always, Recommended, Never.
IMPORTANT! Because the End of Period journal entry is a summarized posting of the total balance from the Four Core Reports (Client Balances, Vendor Balances, ARC/BSP Balances and Check Register), the key to creating an accurate End of Period journal entry is to first verify that the detail contained on each of the Core Reports are accurate. If any of the four Core reports is not accurate, the End of Period Journal entry will also be inaccurate.
Example Journal Entries by Transaction
All Payments Made to Other Entries Should Include
|
Amount of check |
Cash in bank 1000 series |
Credit |
|
Amount of check |
Proper offsetting acct |
Debit |
All Payments Received From Other Should include
|
Amount of check |
Cash in bank 1000 series |
Debit |
|
Amount of check |
Proper offsetting acct |
Credit |
All Bank Withdrawals Entered Entries Should Include
|
Amt of withdrawal |
Cash In Bank 1000 series |
Credit |
|
Amt of withdrawal |
Proper Offsetting Account |
Debit |
All Payments Made to Clients with Pay Method of Other Entries Should Include
|
Amt of payment |
Client Balances 1100 |
Debit |
|
Amt of payment |
Proper Offsetting Account |
Credit |
All Payments Received from Clients with Pay Method of Other Entries Should Include
|
Amt of payment |
Client Balances 1100 |
Credit |
|
Amt of payment |
Proper Offsetting Account |
Debit |
All Payments Made to Vendors with Pay Method of Other Entries Should Include
|
Amt of payment |
Vendor Balances 2000 |
Debit |
|
Amt of payment |
Proper Offsetting Account |
Credit |
All Payments Received from Vendors with Pay Method of Other Entries Should Include
|
Amt of payment |
Vendor Balances 2000 |
Credit |
|
Amt of payment |
Proper Offsetting Account |
Debit |
Example Journal Entries by End of Period
Invoices affect Sales/Cost of sales in the Income Statement. The submit to field and travel type fields in each invoice determine what effect will take place through an End of Period posting. Payments received and made (for all profile types except Other and Payment Methods of Other) affect Accounts Receivables (Client Balances) and Accounts Payables (Vendor Balances) through the End of Period posting. Profile type of Other and Pay method of Other prompt for a journal entry and hit the General Ledger automatically.
Submit to ARC Invoices Journal Entries Created by End of Period
|
Total fare amount in the invoice for the appropriate travel type for the date of issuance. |
Sales 4000’s |
Credit |
|
Difference of the total fare less commission with appropriate travel type for the date of issuance. |
Cost of Sales 5000’s |
Debit |
|
Amount of the total fare in the invoice. |
Client Balances 1100 (A/R) |
Debit |
|
Difference between the total fare and commission amounts. |
ARC Balances 2010 |
Credit |
Submit to Supplier Invoices Journal Entries Created by End of Period
|
Total fare amount in the invoice for the appropriate travel type with the date of issuance. |
Sales 4000’s |
Credit |
|
Difference of the total fare less commission for the same travel type with the data of issuance. |
Cost of Sales 5000’s |
Debit |
|
Amount of the total fare in the invoice. |
Client Balances 1100 (A/R) |
Debit |
|
Difference between the total fare and commission amounts. |
Vendor Balances 2000 (A/P) |
Credit |
Submit to Commission Track Invoices Journal Entries Created by End of Period
|
Total fare amount in the invoice for the appropriate travel type with the date of vendor payment (the date payment was received). |
Sales 4000’s |
Credit |
|
Difference of the total fare and commission for the appropriate travel type with the data of the vendor payment. |
Cost of Sales 5000’s |
Debit |
Payment Received with Profile Type Client and Pay Method of
Cash or Check JE’s Created by End of Period
|
Payment amount entered. |
Client Balances 1100 (A/R) |
Credit |
|
Payment amount entered. |
Cash in Bank 1000 Series |
Debit |
Payment Received with Profile Type Vendor Supplier and Pay Method
Cash or Check JE’s created by End of Period
|
Payment amount entered. |
Cash in Bank 1000 Series |
Debit |
|
Payment amount entered |
Vendor Balances 2000 (A/P) |
Credit |
Payment Received with Profile Type Vendor Comm Track and Pay Method
Cash or Check JE’s Created by End of Period
|
Total fare in the invoice (i.e. $400.00) |
Sales 4000’s |
Credit |
|
Difference between the total fare and commission for the appropriate travel type (i.e. $360.00) |
Vendor Balances 2000 (A/P) |
Credit |
|
Amount of payment received. |
Cash in Bank 1000 Series |
Debit |
Payment Received with Profile Type Client and Pay Method CC Merchant JE’s
Created by End of Period
|
Payment Amount |
Client Balances 1100 (A/R) |
Credit |
|
Payment Amount |
CC Merchant 1150 |
Debit |
Payment Made with Profile Type Supplier and Pay Method
Cash or Check JE’s Created by End of Period
|
Payment Amount |
Client Balances 1100 (A/R) |
Credit |
|
Payment Amount |
Vendor Balances 2000 (A/P) |
Debit |
End of Period Journal Entry
The End of Period journal entry is created automatically when the user decides it’s time to create it by selecting General Ledger|End of Period. The system checks various management reports and takes the totals from those reports to create one large journal entry. This Journal Entry summarizes Sales, Client and Vendor Receipts and Disbursements, and ARC/BSP payments for the period. This journal entry eliminates the need to create separate journal entries for Invoices, Client and Vendor Payments, and ARC/BSP payments.
An End of Period creates a single journal entry updating all Sales, Cost of Sales, Commission Income, Client Balances, Vendor Balances, ARC/BSP Balances and Cash in Bank General Ledger accounts based on invoice, client and vendor payments, and ARC/BSP payments created during the period. The first time the End of Period is created, the system prompts for both From and To dates. All future End of Period entries prompt only for a To date, because the From date is one day greater than the prior period's To date.
Important Note: Although the End of Period creates a journal entry, as with any other journal entry entered into Trams Back Office, it is not posted to the General Ledger until the Posting routine is processed. See the section on Posting.
Once creating an End of Period for a given month or accounting period, Trams Back Office prohibits invoice or payment inputs or modifications within that period. As a result, any report can be printed, at any time, providing a detailed history (or audit trail) of figures used to create any End of Period Journal Entry. Journal Entries, Bank Deposits, and Bank Withdrawals can still be entered within the period.
To see a list of End of Period entries, print a Journal Entry Analysis report for End of Period entries.
If an End of Period entry is created in error or if corrections need to be made to invoices or payments, the End of Period can be voided. (See Voiding an End of Period.)
Full End of Period
There are two types of End of Period entries, Full End of Period and Pseudo EOP. Access the Full End of Period option by going to General Ledger|End of Period.
By default a Full End of Period is created, unless checking Pseudo EOP, see section below.)
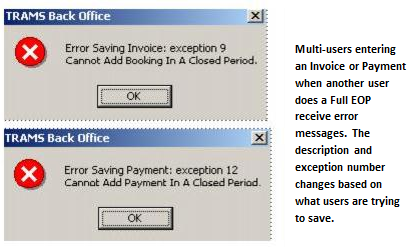
Note: Everyone is logged in automatically as Exclusive Access. Multiusers who are using TBO while a Full End of Period is being performed, receive a message warning them that they are locked out of the payment, invoice, etc. until the Full End of Period is completed. For this reason, multiusers may only want to use the Pseudo EOP option when doing some accounting tasks, until a final End of Period is performed.
Another error message received is Invalid G/L Number: 0. If receiving this message, go to Utilities|Setup|GL Accounts and check the current setup. This error means that one or more of the fields in the Utilities|Setup|GL Accounts is blank.
The Full End of Period can be run and reversed, using the General Ledger|Void|End of Period, as many times as necessary until journal entries are posted. A full End of Period must be created for each period in order to create a year end Journal Entry.
Supplier Booking Closed by CC Can Act Like a Comm Track Booking
Allow a Supplier booking closed by Credit Card to act like a Comm Track booking by modifying the End of Period so the sale is deferred until commission is received. To set up this feature:
Step 1: Select a start date which should be at the beginning of an accounting period.
Step 2: Verify that the accounting period prior to the start date is in balance and that the period is posted.
Step 3: Select General Ledger|Accounts and create a GL account named Supplier CC Receivable in the 1000 series of accounts.
Step 4: Select Utilities|Setup|GL Accts|Others. Next to the Supplier CC Receivable field, enter the GL account number that was created in Step 3.
Step 5: Select Utilities|Setup|Global Defaults|Prompt. Change the Supplier C/C transaction in EOP field to Defer Sales Until Commission Received.
Step 6: Select Reports|Report Generator| Print Report. Print the Report Generator report, CL_TT_AS.RPT (Client Activity by Travel Type) with the following selection criteria.
Date Range: Issue Date
Between: Leave blank
And: Enter the date one day prior to the start date
Invoice Type: All
Submit To: Supplier
Travel Type: All
Invoice Payment Status Client: Closed
Payment Method: C/C
Invoice Payment Status Vendor: Open
Step 7: Select General Ledger|Journal Entry and create a journal entry dated one day prior to the start date. For each Travel Type listed on the report printed in Step 6, debit the appropriate Sales account for the Total Fare amount on the report, credit the appropriate Cost of Sales account for the Net Fare amount on the report, and credit the Supplier CC Receivable account for the Commission amount on the report.
Pseudo End of Period
The other type of End of Period Entry is a Pseudo End of Period. This is used when using Trams Back Office in Multiuser mode. This option creates an End of Period entry without disturbing other users. The entry the Pseudo End of Period creates is a “Normal” journal entry. Use this entry to view the financial and managerial reports in pseudo post.
IMPORTANT! When creating the Pseudo End of Period, there is a prompt to void the entry before creating another End of Period. Void this entry or it will distort the financial statements the next time an End of Period is run. To void a Pseudo End of Period, go to General-Ledger, Query. If you know the record number, enter that or you can type PS (standing for pseudo) into the Remarks field, then select query on the right. This bring ups all Pseudo EOP Entries. Highlight the Pseudo EOP, and select Void.
Journal Entry
Journal Entries are created and then posted to the General Ledger, thereby updating the balances in specific General Ledger accounts. Since most day–to–day journal entries are created automatically from invoice and payment input, individual journal entries entered here are used primarily for adjusting or correcting entries.
Entering Journal Entries
1. To create new journal entries from the General Ledger menu, select Journal Entries, or from the Journal Entry Query screen, click on New, then select Journal Entry:
2. Select the desired settings.
Trams Back Office also prompts for specific Journal Entry line items:
|
Journal Entry Code |
For recurring journal entries a Journal Entry Code can be assigned here for future selection in the Query screen and for easy duplication. |
|
Activity Date |
Type in the date of the financial period to appear. |
|
Group |
A GL Group created in Utilities|Setup|Groups can lump together multiple JE entries for reporting purposes. |
|
Remark |
Remarks are for reference. They appear on all General Ledger historical reports and apply to this entire Journal Entry. |
|
Table 1: Journal Entry line items |
|
|
Account Name /Number |
A specific G.L. account can be identified by either Account #, or Name. Enter all or part of either # or name and Trams Back Office presents a pull-down list of all matches, and allows for selection from that list. If Account Number is entered completely, Trams Back Office selects the specified account without prompting for Name. |
|
Branch |
Trams Back Office allows a branch specifier on journal entry lines where the account number is in the 4000-9999 range. This branch specifier is used when printing an Income Statement for a particular GL branch. Any GL branches are shown under Utilities|Branch Numbers. (Note: Under Utilities|Global Defaults, remember to set the Branch option to FULL.)If the system is set up for Multiple Balance Sheets, enter a specified branch for accounts in the 1000-3999 range also. This branch specifier is used when printing a Balance Sheet. |
|
Debits |
Enter the debit amount to be applied to the specific General Ledger account. If entry is to be a credit amount, leave field blank and click the Credit column. |
|
Credits |
Enter the credit amount to be applied to the specific General Ledger account. If entry is to be a debit amount, leave field blank. |
|
Detail Group |
Tag a Debit or Credit entry with a Detail Group for reporting purposes. This group can be set up under Utilities|Setup|Groups. |
|
Remark |
Enter a specific remark for this Debit or Credit Entry for reporting purposes. |
Note that at the bottom of the column for both debits and credits, Trams Back Office maintains a running total balance for each. For the journal entry to be accepted, debits must equal credits. Most daily journal entries are entered from within the Payments menu when prompted, except for the End of Period journal entry (which the system creates) and any correcting or adjusting entries made from within the General Ledger menu. If journal entries are entered directly from Payments, the Activity Date is set to the Payment Date, and the remarks are filled in, followed by the Profile Name.
On Payments Made, Payments Received and Withdrawals, Trams Back Office automatically completes the first journal entry line (adding or subtracting from the appropriate bank account) and only the offsetting journal entry lines need to be completed. Be sure that bank accounts are assigned to proper General Ledger accounts under Utilities|Setup|GL Accts.
3. Click OK to Save.
Please also review our General Ledger recorded trainings at select Training, TBO, and Recorded Trainings.
JE Import From File
If the agency has very large recurring periodic Journal Entries that would normally be entered by hand or copied and then modified manually there is an option to import an external JE from another source.
When creating a new Journal Entry, right-click anywhere in the JE line-by-line creation window at the bottom of the screen and an Import From File option is displayed.
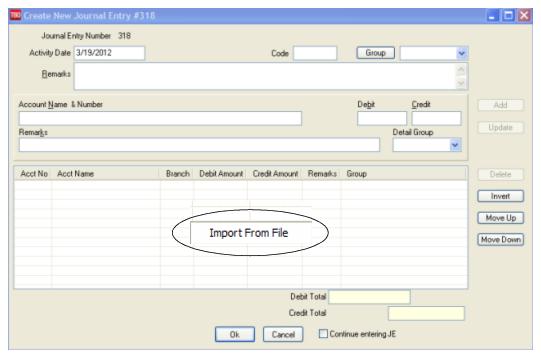
Highlight the displayed box and left- click on it for an Import Journal Entry Details From Files window to open, then browse and select a tab delimited .txt file created for a specific normal Journal Entry.
When that tab delimited .txt file has been created using the proper format, then the Journal Entry, GL Account lines will be populated automatically from the file.
Column Headers that Must be Present in Tab Delimited .txt File for Import to be Successful:
GLNO GLNAME BRANCHNO DEBITAMT CREDITAMT REMARKS GROUP
See Help files, General Ledger|Budget Entry for more details.
Posting JEs to the General Ledger
In order to maintain an accurate audit trail within the General Ledger, a routine is performed monthly to lock in any journal entries made to date so they can no longer be changed or voided. This routine is called Posting your Journal Entries. Until a journal entry is posted it can be changed or voided, even the End of Period journal entry.
Note: Because of posting's permanent effect, this routine is performed with caution, and only after all Core reports are balanced and their corresponding General Ledger accounts are in sync; usually about the middle of the following month.
Once posted, all invoices, payments and journal entries for that period can no longer be changed or voided. However, journal entries can always be added to a posted period if an adjustment needs to be entered. Always process a Trial Balance report before posting, saying yes to Pseudo Post to see the effects Posting will have.
Much time is spent recording daily activities and balancing them. To protect from any future changes once everything is reflecting what it should, posting should be performed. Posting protects the agency from changes that may affect the financials and tax reporting. It does not, however prevent a journal entry from being added to a closed and posted period. We therefore recommend that the creation of journal entries (General ledger/Journal entry) be limited to the person or persons in charge of the financials and be regulated by the use of individual logins. We would also recommend that printed copies of monthly financials be kept on file so that if changes have been made to closed periods they can be identified more easily for verification.
It is also recommended that at the end of each month, run a Journal Entry Query with the Status set as Unposted. Run for an appropriate posted period, year-to-date of last posted period, last-year-to date of last posted period, etc., to view any unposted items that someone might have added or changed in a posted period. Then verify or delete those items, post them, and run new monthly financials to reflect the changes made.
Steps to Post to General Ledger
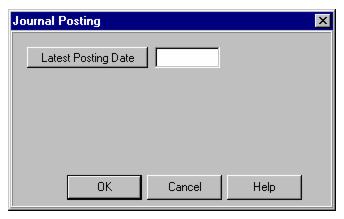
1. Click General Ledger|Posting.
2. In the Latest Posting Date field, type in the last day of the period being posted. All entries are posted up to and including this date. Click OK to process.
3. Trams Back Office prompts: XX Item (s) Will Be Posted? Continue? Yes or No
4. Click YES.
5. Please also review our General Ledger Recorded Trainings at www.Trams.com, select Support, Recorded Trainings.
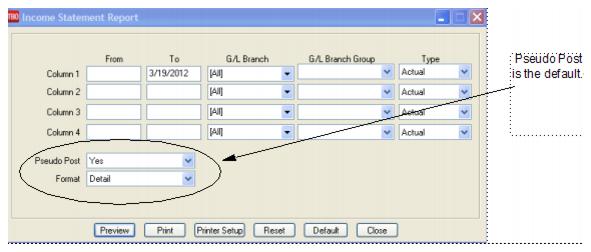
Pseudo Posting Journal Entries
Posting journal entries is not just a Trams Back Office function, but a general accounting function. Unique to Trams Back Office though, is the ability to print financial statements (Income Statements and Balance Sheets) before Posting the journal entries. Trams Back Office does this through a reporting feature called “Pseudo Posting.” This means that, as long as all Invoices and Payments have been turned into journal entries (by transaction and through End of Period), preliminary financial statements can be gathered from Trams Back Office while waiting for bank statements and ARC/BSP reports to be reconciled by Pseudo Posting.
Budget Entry
Budget Entries provide the ability to estimate Sales, Cost of Sales, and Expenses and compare Actual to Budget in the Income Statement.
Entering a Budget Entry is exactly the same as entering a Journal Entry, except that with a Budget Entry, only specify General Ledger accounts in the 4000-9999 range, and the entry doesn’t have to balance - the debits and credits don't have to match. There is also an automatic Budget Entry option (see Generate Budget below). This saves all the work of putting in the budget entries one at a time.
Budget Entries don’t affect the Trial Balance or Balance Sheet. The only report they affect is the Income Statement, when choosing to print Budget Entries. They are not posted to the General Ledger as part of the normal posting routine.
See a list of Budget Entries, by printing a Journal Entry Analysis report for Budget Entries.
Creating a Budget Using JE Import From File
A Budget Journal Entry can also be created from a budget that has been created outside of Trams Back Office, in say Excel. When creating a new Budget Entry, right-click anywhere in the JE line-by-line creation window at the bottom of the screen and an Import From File option is displayed.
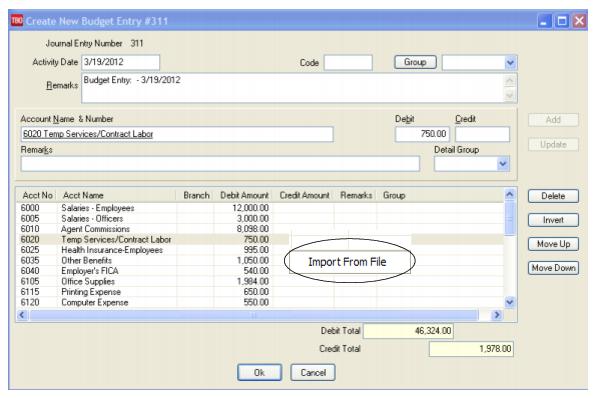
Highlight the displayed box and left-click on it and an Import Journal Entry Details From Files window opens to browse and select a tab-delimited .txt file created for a specific Budget Journal Entry.
When that tab-delimited .txt file has been created using the proper format, then the Budget Entry, GL Account lines are populated automatically from the file.
Column Headers that Must be Present in Tab Delimited .txt File for Import to be Successful:
GLNO GLNAME BRANCHNO DEBITAMT CREDITAMT REMARKS
Year–End Closing
Year-End closing is done once a year. The year-end entry zeros out all Sales (4000 series accounts), Cost of Sales (5000 series accounts), and Expenses (6000, 7000, 8000, and 9000 series accounts), and rolls over the profit or loss into the Retained Earnings (3000 series account).The Retained Earnings account is designated in Utilities|Setup|GL Accounts. The Year-End routine creates a journal entry, which is then posted by the regular posting routine.
1. Enter any adjusting journal entries given by the accountant under General Ledger|Journal Entry. Date adjusting entries with the date the accounting year ends.
2. Go to General Ledger|Posting to post the adjusting Journal Entry. Click General Ledger|Year-End.
3. In the To field, enter the year-end date. Click the OK button to process. This creates the Year-End Journal Entry. Click the OK button to save.
4. Select General Ledger|Posting.
5. Type in the Year-End date in the Latest Posting Date field. Click the OK button to process.
6. TBO prompts, "xxxx items will be Posted. Continue? Yes, No” Click Yes.
Notes: ***If maintaining and balancing the GL in Trams, do an End of Period and balance the last month of the year, and post it before doing the Year-End function.
***When a year-end posting has been performed, modifying, adding or voiding journal entries is prohibited if the entry falls within the year end range. If entering a payment or operating payable with a journal entry within the year end period, the payment will be saved but the user will not be able to finish the journal entry portion of the payment process hence users should void the payment. If trying to enter an operating payable since the journal entry cannot be saved, the entire entry is aborted.
Void End of Period and Year End Entries
Voiding an End of Period
To Void an End of Period from the general ledger menu, click Void, then End of Period. When voiding an End of Period Journal Entry, the system prompts with the last entered End of Period time frame. If this End of Period Journal Entry has not been posted (a “pencil” posting in effect), the system voids the Journal Entry, deleting any history of it and erasing the End of Period restrictions, once again allowing for invoice or payment entries or modifications.
If the End of Period Journal Entry has been Posted (a “pen and ink” version in effect), a warning appears and if OK'd, a similar routine occurs. Instead of voiding the Journal Entry and deleting the history, because it was posted, a reversing entry is created and posted in one step. The reversing Journal Entry created is dated the same date as the original End of Period entry. Please also review our General Ledger recorded trainings at www.Trams.com, select Training, Trams Back Office, and Recorded Trainings.
Voiding a Year-End
To void a Year End from the General Ledger menu, click Void, then Year End. When voiding a Year End journal entry, the system prompts with the last entered Year End's To Date. If this Year End journal entry has not been posted, the system voids the Journal Entry, deleting any history of it.
If the Year End journal entry has been Posted, a warning appears and if OK'd, a similar routine occurs. Instead of voiding the Journal Entry and deleting the history, the system creates a reversing entry. The reversing Journal Entry created is dated the same date as the original Year End entry.
Accounts (Chart of Accounts)
Please refer to chapter Setting Up Trams Back Office, and the section, "Setting Up the Chart of Accounts." Directions on how to add, delete, and modify an account are discussed in great detail.
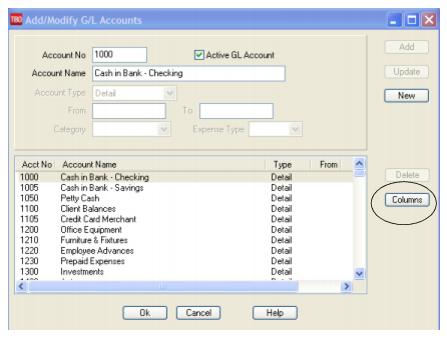
Choose Columns on the General Ledger Accounts Screen
Users can select the columns to appear in the G/L accounts display. Also adjusting column widths in the display are saved when the save settings box is checked.
Example:
1. Go to General Ledger|Accounts.
2. Expand the Account Name field to display more of the name field.
3. Click Columns.
4. Make any adjustments to which columns will be displayed
5. Click the Save Settings box.
6. Both the column width and the column selections will be saved and displayed.
Generate Budget
Trams Back Office has an option of creating a budget based on actual numbers from an income statement.
1. Generate a budget by going to the main General Ledger menu, then to the Generate Budget menu option.
Generate Budget Entry
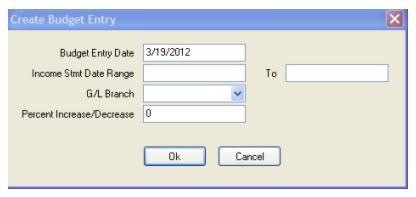
2. The Budget Entry Date is the date of the budget. If this is October and a budget for November is being created, this date would be 11/30/xx. The Income Statement Period contain the dates of the previous Income Statement used to calculate this new budget. In this example, we are creating a budget for 11/30/12 by using our Income Statement from November 2011. Make sure an End of Period has been performed for the Income Statement dates, otherwise income from invoices is NOT included.
3. Enter a G/L Branch for which a budget is being created from the drop-down menu.
4. Enter a percentage increase (or decrease). A percentage increase or decrease affects both sales and expenses. A 10% increase in sales also increases the expenses by 10%. This may not be the goal, so increase or decrease the items individually.
5. Click OK to generate the budget journal entry.
Notice this entry does not balance. Budget entries do not need to balance. They do not involve balance sheet accounts, only Income Statement accounts. Each line item on the budget can be adjusted manually by highlighting the entry, make changes above, click Update. Edit the Remark field, clarifying the budget name or period. Click OK to save this budget entry.
Budgets allow analyzing and evaluating the progress of the agency’s business, making any adjustments to generate sales or cut expenses to reach goals. This makes budget creation quick and easy.
|
You are creating a budget for the month of October and want this budget based on the income statement for the same period last year. Select the main General Ledger menu, then the Generate Budget option. Your Activity Date is “10/31/14.” Enter income statement dates of “10/01/14” to “10/31/14” and put in a 10% increase. Trams Back Office uses the income statement from October 2014 as a base and adds 10% to these numbers. Click OK to save your new budget entry. On October 7, you create an End of Period, and go to the Income Statement screen. Enter the dates “10/01/14” to “10/07/14” in the first line with type set to Actual. You enter “10/01/14” to “10/31/14” on the second line with type set to Budget. Click OK to process this report and see how your agency is progressing. After realizing how much fun this is, you focus on your goal and create a budget for every month of the year. |
G/L Account Reconciliation
View any selected GL Account, GL Account Group, GL Branch or GL Branch Group with the appropriate activity date range. Toggle closed corresponding debit & credit items that are deemed matches.
Debits and Credits must equal to save the reconciliation and the amounts are shown in red when the Debits and Credits do not match. Query GL transactions by Posted Status, and Cleared Status (All, Cleared, Not Cleared) which is very much like only looking at cleared or uncleared in the bank account reconciliation, only it can be done for any GL account.
This reconciliation does not affect any accounting data and the status of any reconciled items is only reflected on the G/L Reconciliation screen itself.
This feature is very useful for 'slush' accounts where items go in and out all the time and the agency just needs to know what items are not yet offset or OPEN. Use it for both company credit card charges to keep track of what has been charged but not yet billed/paid and also for a payroll account that lists advances to employees which need to 'clear' or 'close' after entering the payroll deduction.
Suggested General Ledger Procedures
1. ARC/BSP Balance Report
- Enter sales and payment information on a daily basis.
- Submit the report weekly to ARC/BSP.
- Reconcile the ARC/BSP Settlement each week.
2. Client Balances Report
- Enter sales and payment information on a daily basis.
- View on a regular basis and review for accuracy.
3. Vendor Balances Report
- Enter sales and payment information on a daily basis.
- View on a regular basis and review for accuracy.
4. Check Register Report
- Enter Deposits, Withdrawals and Checks on a daily basis.
- Balance and reconcile against the Bank Statement each month.
Daily Routine
1. Capture Sale and Refund Invoices (manual or interface). Enter all adjustment invoices such as debit/credit memos.
2. Enter Receipts and balance the Bank Deposit:
a) Enter each separate receipt under Payments|Received. (If there is information available, consider entering any EFT (Electronic Fund Transfer) or Direct Deposit receipts for the day. As these type transactions hit the Check Register directly, these items are not included in the daily deposit to the bank.)
b) Under Payments|Deposits, verify the date for which the deposit is being done and Query for the receipts to be included in the Deposit.
c) Verify the receipts that are included are receipts actually going to be deposited in the bank.
d) Print 2 deposit slips - one for the agency records and one for the bank.
3. Print a copy of a Receipts Report (Reports|Payments|Receipts) for all Cash/Check receipts for each bank account for the day. Balance the total on the report to the bank deposit slip. Attach the report to the agency copy of the deposit slip and file.
4. Enter all agency disbursements in Payments|Made.
5. Run the Four Core Reports and review for errors: Client Balances, Vendor Balances, ARC/BSP Reconciliation and Check Register.
6. Run the G/L Reconciliation Report to catch any G/L errors daily.
7. Backup files (Utilities|Backup)!
Weekly (ARC/IAR Sales Report/Reconciliation) Routine
Step 1. Check that the data in the IAR Sales Report matches data in Trams Back Office by one of three methods:
a) Method One: Run a list of all invoices captured in Trams by going into Reports|Invoice|Analysis and verifying that all invoices for the week are accounted for in Trams. Then, run a list of all tickets captured in Trams by going into Reports|Invoice|ARC/BSP Reconciliation and verifying that all tickets issued for the week are accounted for in Trams, and be sure to set ticket status to ALL.
b) Method Two: Download the IAR file from the IAR website. Go to Reports|Invoice|IAR Reconciliation and click the IAR File button to point to the path of the downloaded .txt file obtained from the IAR website. Print out an Exception Report which points out differences between what was submitted to IAR and Trams Back Office.
c) Method Three: Download the IAR file from the IAR website.
-- Go to Payments|ARC Settlement.
-- Query for the week’s ARC tickets so they are displayed on the settlement screen.
-- Click IAR Reconciliation on the ARC Settlement screen.
-- Click IAR Filename and map to the weekly IAR file.
-- Click Query to see the standard IAR Reconciliation Report.
-- For tickets where Net Remit Do Not Match, Ticket Is Voided in IAR but Not in Trams, or Missing IAR Ticket, click Find Ticket and the cursor lands on the appropriate ticket on the ARC Settlement screen so Edit Invoice appears as normal.
-- For tickets that are Voided In Trams but Not In IAR, click Find Ticket to go to the booking containing that voided ticket in TBO, so it can be unvoided, allowing the ticket to now show correctly on the ARC Settlement Screen.
-- For any exceptions that are Missing Trams Ticket, click off the IAR Reconciliation screen, and manually add the missing tickets. If doing this method, no need to do Steps 2 and 4 below.
Note: This is the same IAR Reconciliation exception report that was only available before under Reports|Invoice|IAR Reconciliation. The IAR Reconciliation from the ARC Settlement screen works the same way and provides that same exception report, but now has linking ability to the tickets displayed on the ARC Settlement Screen.
Step 2. Enter any missing Refunds, Debit Memos, Voids, etc. so Trams Back Office agrees with IAR Sales Report.
Step 3. Enter and balance the ARC/BSP Settlement for the week under Payments|ARC Settlement. Do this by comparing the amount withdrawn to the amount Trams calculated as the Net Remittance amount for that ARC/BSP week. If the two numbers do not balance exactly, review the ARC/BSP Settlement section of this manual.
Step 4. Submit the IAR Sales Report.
If processing through ARC/IAR, complete the ARC Settlement right after submitting the IAR Sales Report.
Weekly (BSP Sales Report/Reconciliation)

Complete the BSP Settlement after Weekly Sales Summary has been received from BSP as amounts could be changed from what was submitted.
1. Print an Invoice Analysis Report (Reports|Invoice|Analysis) to verify all invoices issued during the week are entered in Trams.
2. Print a BSP Reconciliation Report (Reports|Core|BSP Reconciliation). Set the ticket status to ALL to verify all tickets issued for the week are entered in Trams.
3. Submit BSP Link report through the Internet. If necessary, print the BSP Report (Report|Invoice|BSP), set the Included Items to Manual, and mail it to the area bank.
4. If not using the BSP Link, print the BSP Report (Reports/Invoice/BSP) and mail it to the area bank with the auditors’ coupons from the tickets issued, or verify cash and credit card totals and period net remit if submitting the report through BSP Link.
5. Reconcile BSP’s Weekly Sales Summary Report by entering the amount of the BSP Withdrawal in Payments|BSP Settlement. Adjust each Trams entry to match BSP’s report and close all bookings paid for in that BSP period.
Weekly BSP HOT Reconciliation Routine
A BSP HOT Reconciliation can be found under Reports|Invoice|BSP Reconciliation. To receive a copy of the BSP Report in the HOT file format, contact:
www.IATA.org/customer
Trams Back Office compares the data in the HOT file to the information in Trams Back Office and generates an exception report which lists all the differences between the Trams Back Office data and the HOT file. Once the transactions on the exceptions reports have been addressed, the BSP Settlement routine can be completed. The Submit to field in the TBO booking must be set to BSP (for both BSP and Web bookings reported via BSP). For web booking exchange transactions, see additional information below.
Reconciliation Steps
1. Download the HOT file from the IATA Web Site
2. In TBO, go to Reports/Invoice/HOT Reconciliation
3. Click the HOT File Button and browse to where the file was saved
4. Click the Preview Button
5. Reconcile the Exceptions that appear on the Exception Report
Sample Exceptions
|
Ticket # |
Inv # |
Exception Reason |
|
7771113333 |
5589 |
Missing HOT Ticket – Ticket is not listed in the HOT file |
|
7771113358 |
5598 |
Missing TBO Ticket – Ticket is listed in the HOT file but cannot be found in TBO |
|
7771113362 |
5600 |
Remittance Amounts do not match – Commission amounts do not match |
|
7771113375 |
5612 |
Total Fares do not match – Ticket amount does not match total fare amount in TBO |
Non-automated air web booking exchanges (Air Canada, Westjet, etc.), must contain Trams Descriptor codes to properly flag the transaction as an exchange. The original ticket number must also be added to populate the original ticket field in the booking.
Examples (to be added in addition to other accounting line information)
*EXE – Even exchange
*EXA – Exchange with an add collect
*EXR – Exchange Refund
*OT – Original Ticket number
Sabre
ACOTH1/SUPPLY/DOC/P11/950.00/0/ALL/CK/*SBA*TT1*VCAC*EXE*OT7771113375
Worldspan
AC1-A*TT1*VCAC*EXE*OT7771113375
Apollo
T-MS9A*VCAC*TT1*CM10*CF123456*SG*EXE*OT7771113375
Amadeus
RM*9A*VCAC*TT1*CM10*CF123456*SG*EXE*OT7771113375
Monthly Checklist
1. Using Trams Back Office Bank Reconciliation routine under (Payments|Bank Reconciliation), balance the bank statement to the Trams Back Office check register. Print a copy of the Check Register for the month for ALL along with a second Check Register Report for Not Cleared, and staple it to the statement from the bank and file.
2. Create an End of Period journal entry (General Ledger|End of Period) for the month.
3. Print a trial balance. Compare the Management Summary Report balances to their corresponding General Ledger accounts and make sure they are the same. If not, print a GL Reconciliation (Reports|General Ledger|GL Reconciliation) to locate any possible errors. Note: There is a Total Base column on this report, The yield percentage is the commission divided by total base.
Optional: Run a Journal Entry Query with the Status set as Unposted. Run for an appropriate posted period, year-to-date of last posted period, last-year-to date of last posted period, etc., to view any unposted items that someone might have added or changed in a posted period. Verify or delete those items, post them, and run new monthly financials to reflect the changes made.
4. When (and only when) everything is in balance, post the journal entries made and print Financial Statements. Audit Trail reports could include Trial Balance, Income Statement, Balance Sheet, End of Period Reports, Account History, or Journal Entry Analysis.
TBO End of Period Reports
End of Period reports can be found under Reports|Batch Reports|Load.
1. Sales Activity Report: Select Reports|Invoice|Activity. Set Format to “Summary”, set Submit To as “ARC or BSP/Supplier” and set Invoice Status to “All.”
Trams uses this report to show what has been updated in the GL by the End of Period in Sales, Cost of Sales, Client Balances, Vendor Balances and ARC/BSP Balances. The ARC/BSP Adjustments account is also updated for Debit/Credit Invoices.
2. Sales Activity Report: Select Reports|Invoice|Activity. Set Format to “Summary”, set Submit To as “Comm Track” and set Invoice Status to “Closed.”
If Commission Track Payments in EOP under Utilities|Setup|Global Defaults is set to the Sales/Cost of Sales option, Trams uses this report to show what has been updated in the GL by EOP in Sales, Cost of Sales and Cash in Bank. If it is set to the Commission Income option, Trams updates Cash in Bank and Commission Income.
3. Receipts Report: Select Reports|Payments|Receipts. Set the Pay Method as “Credit Card” and set Received From as “Client.”
Trams uses this report to show what has been update by the EOP in Client Balances, Vendor Balances & ARC/BSP Balances.
4. Disbursements Report: Select Reports|Payments|Disbursements. Set the Pay Method to “Credit Card” and set Paid To as “Client.”
Trams uses this report to show what has been updated by EOP in Client Balances, Vendor Balances & ARC/BSP Balances.
5. Receipts Report: Select Reports|Payments|Receipts. Set the Pay Method to “Cash/Check/EFT” and set Received From as “Client.” Trams creates this report for each bank account. The system creates the report a second time with Received From set to “Vendor.”
Trams uses this report to show what has been updated by EOP in Cash, Client Balances & Vendor Balances. The Receipts Report also shows EOP updates in ARC/BSP Balances for EFT's from ARC/BSP.
6. Disbursements Report: Select Reports|Payments|Disbursements. Set the Pay Method to “Cash/Check/EFT” and set Profile Type as “Client.” Trams creates this report for each bank account. The system creates the report a second time with Paid To set to “Vendor.”
Trams uses this report to show EOP updates in Cash, Client Balances and Vendor Balances. The Disbursements Report also updates ARC/BSP Balances for EFT's to ARC/BSP.
7. Receipts Report: Select Reports|Payments|Receipts. Set the Pay Method to “CC Merchant” and set Received From as “Client.”
Trams uses this report to show EOP updates in Cash and the CC Merchant account.
8. Disbursements Report: Select Reports|Payments|Disbursements. Set the Pay Method to “CC Merchant” and set Paid To as “Client.”
Trams uses this report to show EOP updates to Cash and the CC Merchant account.
Additional End of Period Reports for BSP Users
At the end of each month, run the following reports to verify the amount of TAX to be paid.
1) Run an Invoice Activity Report by going to Reports|Invoice|Activity.
2) Compare the tax amounts on this report with the amounts in the Balance Sheet accounts created for these taxes (Reports|General Ledger|Account History).
3) When sending the quarterly check to pay the tax due, go to Payments|Made. Enter the amount of the tax due. Use the profile type "Other" that was created for these taxes and create the following journal entry:
Debit Credit
Cash in Bank 500.00
GST Payable 500.00
Summary
If the Core Reports are being successfully maintained, financial statements are easily obtained through Trams, provided opening balances have been correctly entered. It is important to provide these basic financial statements, as well as a detailed audit trail, to the agency accountant for review. In addition to the Income Statement and Balance Sheet reports, several audit trail reports, including the Account History report, are also available.
Note: The recommendations contained in this application Note are designed to allow the TramsBack Office system to produce information in a manner which Trams believes to be useful to a travel agency; however, Trams makes no representation or warranty that the recommendations, if applied, will conform to generally accepted accounting or auditing practices or principals or to any type of financial reporting requirements. To the extent that any reports generated by Trams Back Office are used for reporting purposes, including tax reporting, we strongly suggest to review these recommendations either with a certified public accountant or tax advisor, as applicable.
Maintain the GL & Balancing Core Reports to Trial Balance Report
Once the bank statement and all ARC/BSP reports for the month are reconciled:
1. Click General Ledger|End of Period and create the End of Period journal entry.
2. Print the Trial Balance Report. (Reports|General Ledger|Trial Balance)
3. Print the Management Summary Report and Note the balances for the following Core Report totals:
Client Balances
Vendor Balances
ARC Balances
Check Register
Note: There is a Total Base column on this report, The yield percentage is the commission divided by total base.
5. Each month, compare the Ending Balances of all Core Reports against the Trial Balance Report. The Core Reports and the Trial Balance Report should balance to the pennybefore posting occurs. If one or more of the Core Reports does not balance to the Trial Balance, print the GL ReconciliationReport.
a. Click Reports|General Ledger|GL Reconciliation.
b. Although not every entry on this report needs to be cleared off, the report gives the best idea of why the Trial Balance is out of balance. Check each item’s warning message. (For warning definitions see the manual under Reports|General Ledger|GL Reconciliation Report.) To make corrections, Void the End of Period first.
c. After making corrections, create the End of Period journal entry again.
d. Print the Core Reports again, along with the Trial Balance Report.
e. Verify that the Core Reports and the Trial Balance are now in sync.
6. When the Four Core Reports match the Trial Balance, go ahead and post. Posting to the General Ledger is permanent. Changes can no longer be made to the journal entries; however, adjusting journal entries can always be added to the period if needed. Click General Ledger|Posting and Post to the General Ledger.
GL Reconciliation Report
The GL Reconciliation report is used to aid in reconciling financial reports at the end of the month. It flags items that could possibly cause financials to be out of balance when compared against the Core reports.
- Select Reports|General Ledger|GL Reconciliation.
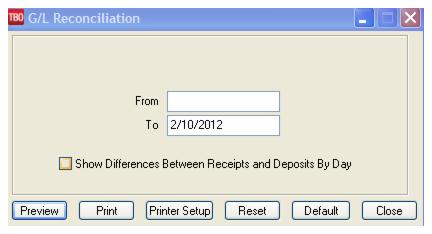
2. Type in the From and To dates for the period being reconciled.
3. Click Preview to view on screen. (Or click Print to send report directly to the printer without viewing.)
4. The report displays a list of items that may need correcting. Query each item and correct it if needed.
Possible GL Reconciliation Messages
|
Message |
Description |
|
Payable is not Journalized and Should Be |
|
|
Payment Is Journalized and Shouldn’t Be |
Only Payments Received and Made where the Profile Type is Other or where the Payment Method is Other, or Bank Withdrawals should be journalized. |
|
Payment Is Not Journalized and Should Be |
Payments Received and Made where the Profile Type is Other, or where the Payment Method is Other, or Bank Withdrawals must have a journal entry. |
|
Payment Amount Doesn’t Match Journal Entry Amount |
The amount of the payment does not match the amount posted to the Cash in Bank account in the journal entry. This message also appears if the amount is being posted to the incorrect Cash in Bank account or the debits and credits have been reversed. |
|
Payment Date Doesn’t Match Journal Entry Date |
The date on the payment screen should always match the date in the journal entry screen. |
|
Pymt Invalid For JE That Affects Client Balances*** |
1) A journal entry should only affect Client Balances when a Payment Received or Made is entered that has a payment method of Other and a profile type of Client. 2) A Pseudo EOP entry exists. |
|
Pymt Invalid For JE That Affects ARC/BSP*** |
1) A journal entry should only affect ARC/BSP when a Payment Received or Made is entered that has a payment method of EFT and a profile type of Vendor-ARC/BSP. 2) A Pseudo EOP entry exists. |
|
Pymt Invalid For JE That Affects Vendor Balances*** |
1) A journal entry should only affect Vendor Balances when a Payment Received or Made is entered that has a payment method of Other and a profile type of Vendor-Supplier. 2) A Pseudo EOP entry exists. |
|
Pymt Invalid For JE That Affects Cash In Bank*** |
1) A journal entry should only affect Cash in Bank when a Payment Received or Made is entered that has a payment method of cash, check or EFT and a profile type of Client, Vendor or Other. Also for Bank Withdrawals. 2) A Pseudo EOP entry exists. |
|
Credit Card Pymt Date Doesn’t Match Invoice Date |
A client payment with a payment method of Credit Card should have the same date of the invoice. |
|
Bank Account #1 Difference Between Receipts And Deposits: 500.00 |
There should always be a receipts report to match every deposit. The message means there is a discrepancy and the deposit entered needs to be re-reconciled. |
|
Zero Dollar Client or Vendor Balance Journal Entries Exist |
User creates a payment received from a client with a payment method of other, invoice appears and user marks it closed. When the journal entry comes up TBO shows credit to Client Balances (which is correct), but the user then makes the Debit to Client Balances also which throws off the GL. |
*** When a Posted End of Period is voided, the entry is converted back into a normal journal entry and a reversing journal entry is also created. This results in these messages seen here. If receiving these messages as the result of a voided End of Period, ignore the message.